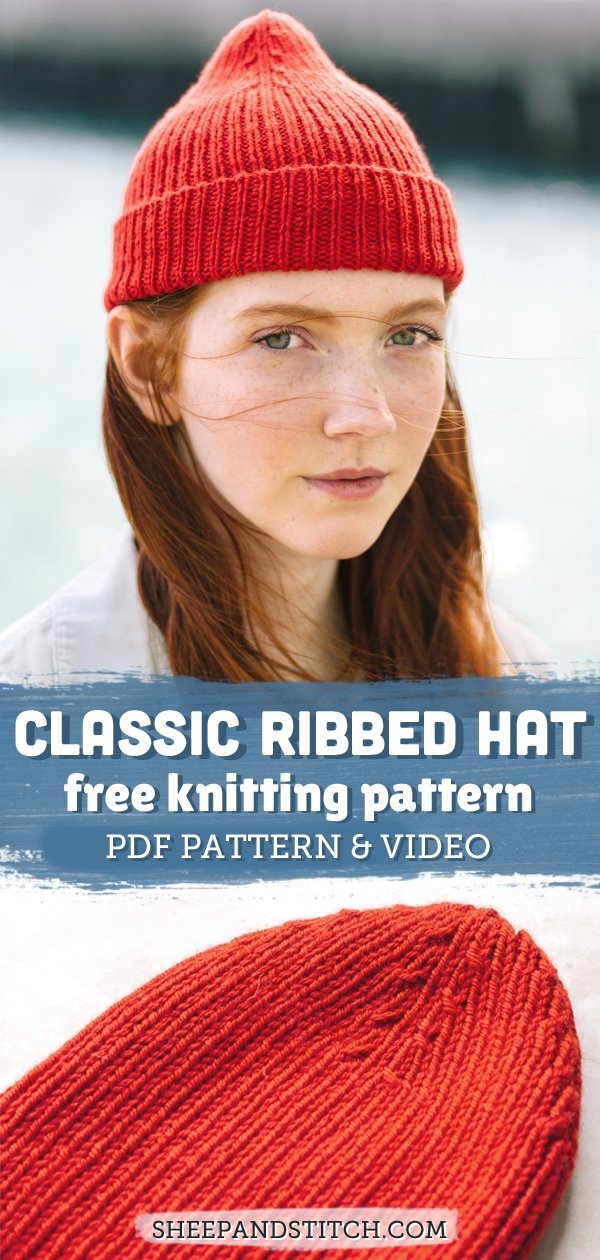
How to Knit a Classic Beanie (Free Pattern and Video)
May contain affiliate links (what's this?)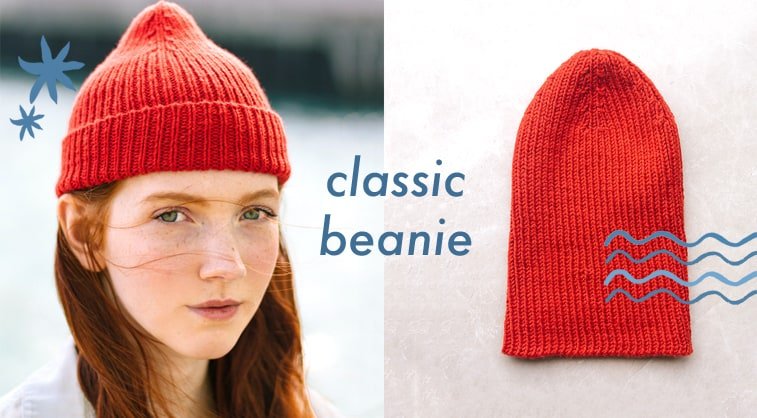
In this post, I’ll show you how to knit a classic beanie. Some may call them a watch cap or a fisherman’s beanie or maybe a toque (if you’re Canadian!)
Whatever you call it, I’ll show you how to knit this classic hat step-by-step.
This beanie is knit in a beginner-friendly 1×1 rib, and it’s got a sleek decrease that keeps the rib pattern intact.
It can be worn cuffed for a fisherman’s look or un-cuffed for a slouchy feel.
With two sizes, one for adults and one for babies and toddlers, this hat is perfect for the whole family!
Buy the PDF Beanie Pattern
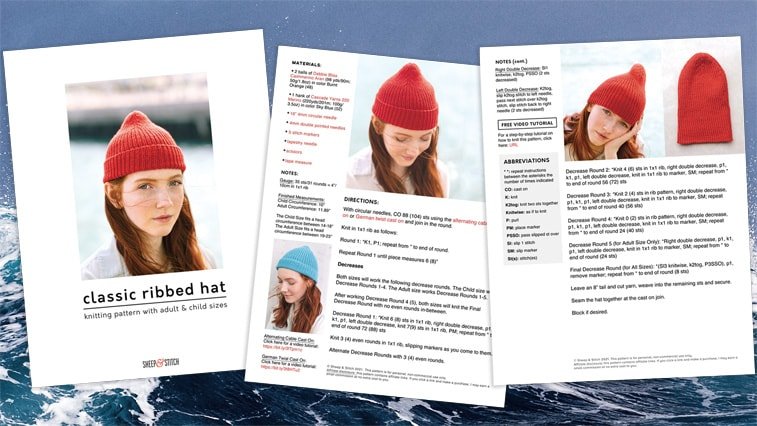
For the price of a coffee you can support Sheep & Stitch by purchasing a PDF file of this pattern. This 3-page PDF file is beautifully laid out and ready to be printed!
To purchase the pattern, click the button below or visit the pattern shop. Upon purchase, the pattern PDF file will be delivered to you by email. Thank you for your support!

A Very Brief History of the Watch Cap
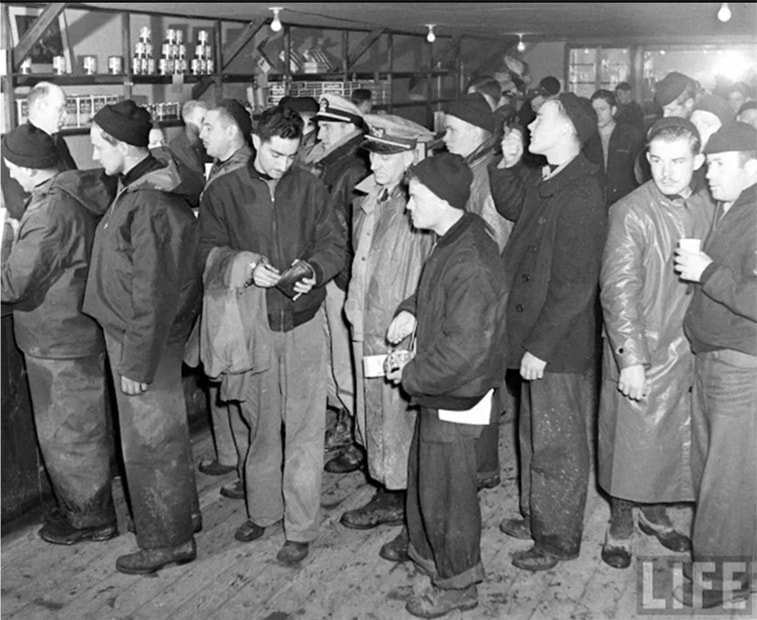
The watch cap gets its name from Navy sailors who wore them while keeping watch in the night. These hats were knit from dense wool to protect the wearer from the harsh winds of the high seas.
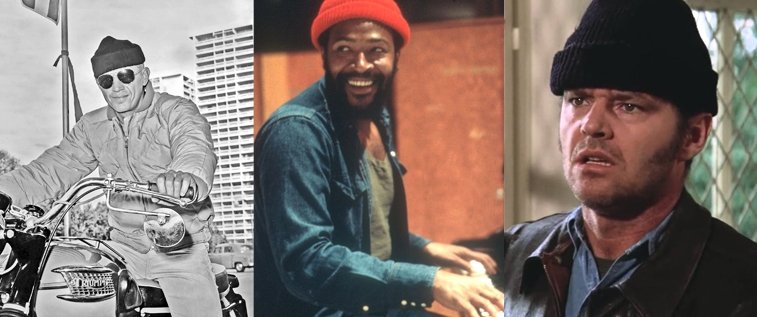
From its seafaring roots, the cap made its way into pop culture: Steve McQueen riding a motorcycle in a watch cap; Marvin Gay with this tiny cuffed cap; Jack Nicholson’s in One Flew Over the Cuckoo’s Nest.
These days, watch caps are a fashion staple. From rugged woodsmen to rappers to construction workers to skaters and hipsters, the watch cap is truly universal.
Who Should Knit a Ribbed Hat?
This pattern is for advanced beginner knitters who can:
Hat Sizing and Finished Measurements
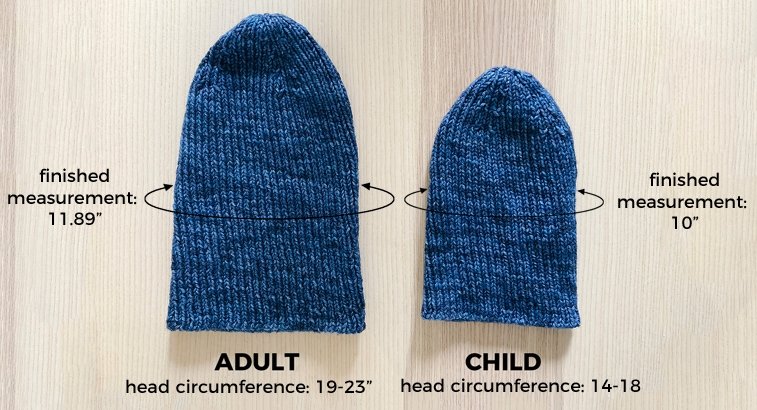
This rib hat pattern comes in two sizes: one for adults and one for babies and toddlers.
The child size is for heads that measure 14-18” while the adult size fits best for heads between 19-23”
The finished measurement of the hats may seem small at a circumference of 10” and 11.89”. But remember that 1×1 rib is extremely stretchy!
Materials & Notes
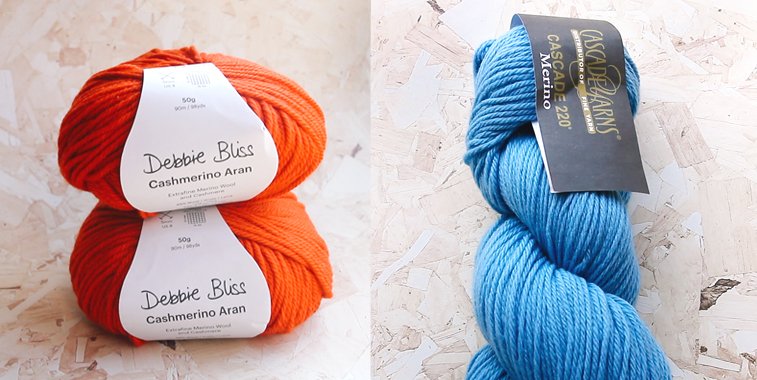
Yarns Used:
- 2 balls of Debbie Bliss Cashmerino Aran in color Burnt Orange
- 1 hank of Cascade Yarns 220 Merino in color Sky Blue
Gauge: 35 sts/ 31 rounds = 4”/10cm in 1×1 rib
Other Recommended Yarns:
- Paintbox Yarns Simply Aran (100% acrylic and very affordable)
- Malabrigo Rios (my favourite hand-dyed merino yarn in jewel-toned colors)
- Berroco Lanas (beautiful heathered colors in 100% wool)
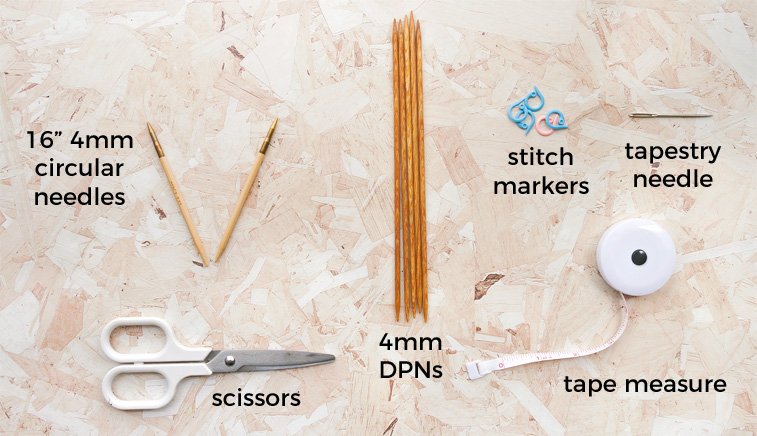
Recommended Needles:
- 16” 4mm circular needle
- set of 4mm double pointed needles
(These needles are just a recommendation. Use a needle size that gets you gauge!)
Notions:
- 5 Stitch Markers (Lovecrafts/Amazon)
- Scissors (Lovecrafts/Amazon)
- Tape Measure (Lovecrafts/Amazon)
- Tapestry Needle (Lovecrafts/Amazon)
Pattern Notes:
Alternating Cable Cast On: this cast on creates a very stretchy edge that merges seamlessly into the 1×1 rib. Click here for an alternating cable cast on tutorial or watch the video tutorial above.
German Twist Cast On: this cast is similar to the longtail cast on and creates a much stretchier edge. Click here for a German twist cast on tutorial or watch the video tutorial above.
1×1 Rib:
All Rounds: *K1, P1; repeat from * to end of round
Rib Hat Video Tutorial:
For a step-by-step tutorial on how to knit this ribbed hat, look no further than this video tutorial. In it, I cover every aspect of the pattern, from cast on to cast off.

Watch this video on YouTube to get access to the video chapters and timestamps.
Knitting Instructions:
CO 88 (104) sts using the German twist cast on or alternating cable cast on and join in the round.
Knit in 1×1 rib as follows:
Round 1: *K1, P1; repeat from * to end of round
Repeat Round 1 until piece measures 6 (8)”
Decreases
Both sizes will work the following decrease rounds. Child size works Decrease Rounds 1-4. Adult size works Decrease Rounds 1-5.
After working Decrease Round 4 (5), both sizes knit Final Decrease Round with no even rounds in-between.
Decrease Round 1: *Knit 6 (8) sts in rib pattern, double right decrease, p1, k1, p1, double left decrease, knit 7(9) sts in rib pattern, PM; repeat from * to end of round 72 (88) sts
Knit 3 (4) even rounds in 1×1 rib, slipping the markers as you come to them.
Alternate Decrease Rounds with 3 (4) rounds even.
Decrease Round 2: *Knit 4(6) sts in rib pattern, right double decrease, p1, k1, p1, left double decrease, knit in rib pattern to marker, SM; repeat from * to end of round 56 (72) sts
Decrease Round 3: *Knit 2 (4) sts in rib pattern, right double decrease, p1, k1, p1, left double decrease, p1, SM; repeat from * to end of round 40 (56 sts)
Decrease Round 4: *Knit 0 (2) sts in rib pattern, right double decrease, p1, k1, p1, left double decrease, knit in rib pattern to marker, SM; repeat from * to end of round 24 (40 sts)
Decrease Round 5 for Adult Size Only: *Right double decrease, p1, k1, p1, left double decrease, knit in rib pattern to marker, SM; repeat from * to end of round (24 sts)
Final Decrease Round for Both Sizes: *(Sl3 knitwise, k2tog, P3SSO), p1, remove marker ; repeat to end of round (8 sts)
Finishing
Leave an 8” tail and cut yarn, weave into the remaining sts and secure.
Weave in ends at the cast on join.
Block if desired.
ABBREVIATIONS
* *: repeat instructions between the asterisks the number of times indicated
CO: cast on
K: knit
K2tog: knit two sts together
Knitwise: as if to knit
P: purl
PM: place marker
PSSO: pass slipped st(s) over
Sl: slip 1 stitch
SM: slip marker
St(s): stitch(es)
Support Sheep & Stitch
While the pattern instructions and video tutorial are free and available above, for the price of a coffee you can support Sheep & Stitch by purchasing a PDF file of this pattern. This 3-page PDF file is beautifully laid out and ready to be printed!
To purchase the pattern, click the button below or visit the pattern shop. Upon purchase, the pattern PDF file will be delivered to you by email. Thank you for your support!

Your hat is so beautiful. 🙂
I finally found where to order the classic Beanie $4 pattern. It gave me an order number but after I paid for it I couldn’t find the order number. Can you email me that order number? It says I can download it 5 times.
Thank you.
Sandy
Hi Sandy, I’ve just sent you an email with the PDF file attached in case you didn’t receive the order email. Let me know if you encounter any other issues!
Hey Davina, I double-dog-dare you to figure out a way to knit a fully cabled, flowers-and-bunnies design, fair isle sweater with super fine yarn (Mora from malabrigo of course) in five different colors all by yourself, and then publish it as your next pattern for everyone to see with a matching hat, cowl, and pair of socks and call it “The Spring Set” and make it a premium pattern worth twenty dollars. Your first impulse is probably to say no, but think about it. It would explode in terms of popularity, and to the millions of followers of sheep and stitch, just think of how many people would want to buy it! 2 million x 20 = … tons of money. You could buy so much yarn!
Hi, Davina. Firstly, thank you for the well explained pattern and video tutorial! This really encourage me to knit something xD. Btw, I have a question. I want to make a gauge swatch but I kinda confused, should I making it in flat or round with DPN?
Thank you!
Hi Anna, if the pattern you’re making is knit in the round then knit the gauge swatch in the round. If the pattern is knit flat then knit the gauge swatch flat.
Hi Davina. Would it be possible to start and finish on DPKs alone? I can’t find 4mm 16″ needles anywhere 🙁 Thanks!
Yes you can absolutely knit the whole hat on DPNS!
Hi I watched this video and you had done a great job in describing in details.
I am trying to use this decrease stitch technique to knit a bag which is very much swallower than a beanie. Any recommendations how I can do that?
This is the best beanie on the web. Easy instructions and a perfect fit every time.
THANKYOU for sharing
Hi! Love your patterns and videos! Just a question, do I have to use DPN necessarily? I only have circular or normal ones! Thank youuuuu
You can start with 16″ circular needles, but as you decrease the hat you’ll need to knit with DPNs or with a longer circular needle using magic loop.
Hi! Do you have any modifications on number of stitches based on the yarn size? I want to make this beanie but with a thinner yarn and Im thinking I should make more than 104 stitches but then the whole pattern would have to be modified.
Thank you and love your work!
same here!
i think we would need to make a gauge swatch to match the one in pattern & modify from there
Hi there! In the video tutorial you knit one row flat before joining in the round, but I don’t see that in the written instructions here. Can you advise which approach is best? Thank you!!
*you complete one row flat (in 1×1 ribbing)
Oh dear! You’re right. If you’re casting on with alternating cable cast on then you’ll need to knit one row flat before joining in the round. However if you cast on with any other cast on, then there’s no need to do one round flat. You can just join in the round straight away. Hope that makes sense!
Hey! That beanie is fantastic, thank you. I’ve now been struggling for at least two days with the decrease. I’ve used a thinner yarn, so I ended up with 178 stitches. Would you be so kind and help with figuring out the decrease pattern please? I’m really stuck, and I’ve spent hours watching tutorials… Thank you x
There’s an error in the decrease round 3 above, it says p1, SM, when it should be ‘knit in rib pattern to marker’, SM.
wish i had read this before doing decrease round 3, now i’m unraveling this hat for the second time. getting very discouraged.
Hello. It looks to me like the decreases are leaning in towards the center line that they are on either side of. I knit it the way the pattern says first, and this did not look right. Shouldn’t it be double LEFT increase first, p1 k1 p1, then double RIGHT decrease? Or do my eyes deceive me
Hi! Loving this tutorial! I came away with an extra stitch after the decrease round 2. I have 73. Any tips on how to fix this? Thank you!!
What style of knitting is this? I have a friend that knits very differently, omitting the need to wrap yarn around the needle.
Trying to learn what’s easiest for me!
Thanks for the tutorial!
Hi, I’m knitting “English style” as opposed to continental style. I think the way I “throw” the yarn is also sometimes referred to as “lever knitting”
Hi Davina,
After Decrease 5 for the adult hat, should we knit 4 rows even before the final decrease round? The video tutorial doesn’t show you knitting 4 even before the final decrease.
Thanks!
Good question! After working Decrease Round 5 for the adult size, go straight to knit Final Decrease Round with no even rounds in-between. I have the instruction for this in the pattern under the “Decreases” heading, but you may have missed it!
I see buy for 699. where is the PDF for free?
Hi, please scroll down this page. Under “knitting instructions” you’ll see the pattern!