How to Knit with Double Pointed Needles for Beginners
May contain affiliate links (what's this?)
Table of Contents
What are Double Pointed Needles?
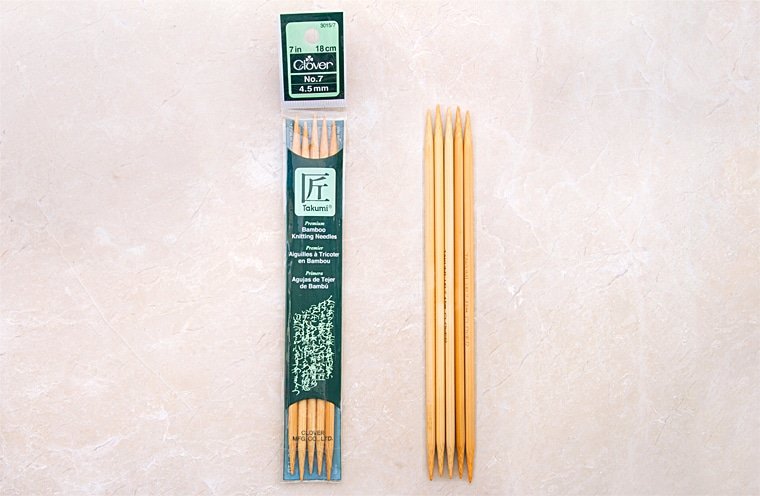
Double pointed needles are for knitting small things in the round. They usually come in a set of four or five needles. As their name implies, both needle ends are pointed, meaning that you can knit from either end of the needle.
This makes it possible to join the needles in a round an d knit on and off of them. We’ll go through how to do it in this post!
Different Types of Double Pointed Needles
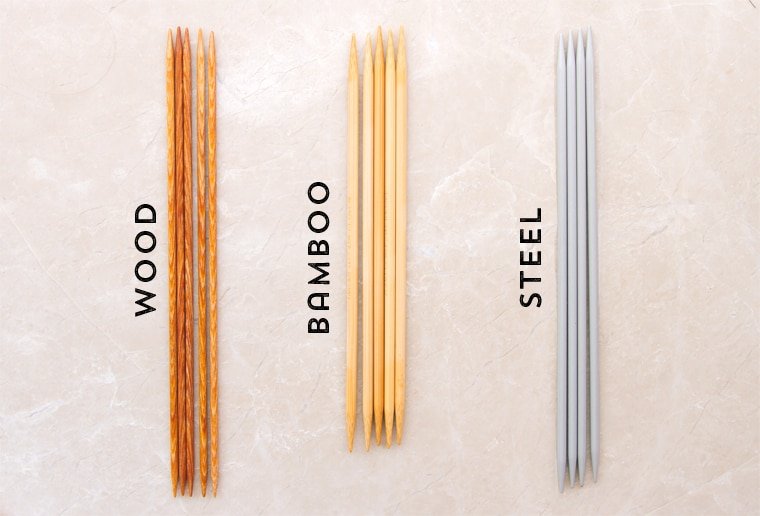
Double pointed needles (heretofore referred to as DPNs) come in different lengths and materials. So, which length and material is right for you?
For beginners, I always recommend wood or bamboo DPNs. This is because both wood and bamboo have surface drag, making them less slippery to work with. I’m not a fan of steel or aluminium DPNS because I find them too slippery for beginners.
In terms of length, DPNs can be as short as four inches and as long as ten inches. The length of a double pointed needle really depends on what you’re knitting.
If you’re knitting something with a small circumference, like a pair of socks, then a length of five or six inches will suffice. But if you’re knitting a hat, then eight or ten inch needles will be more comfortable.
The most popular DPN lengths fall between five and eight inches.
Here are some DPNs I’ve used and recommend for beginners:
- Knit Pro Basix Beech DPNs
- Pony Bamboo DPNs
- KnitPro Symfonie DPNs (beautiful colors!)
Double Pointed Needles vs Circular Needles
Maybe you’ve heard of circular needles. You know, those long cable things with needles attached to each end? You might wonder, what’s the difference between circular needles and DPNs?
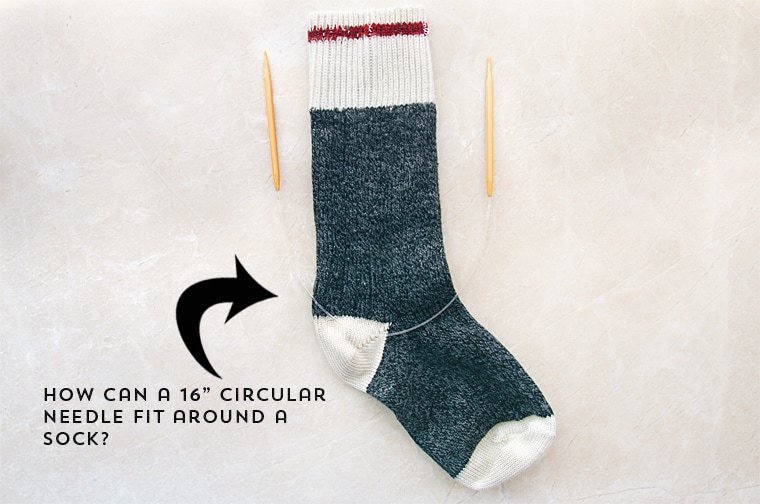
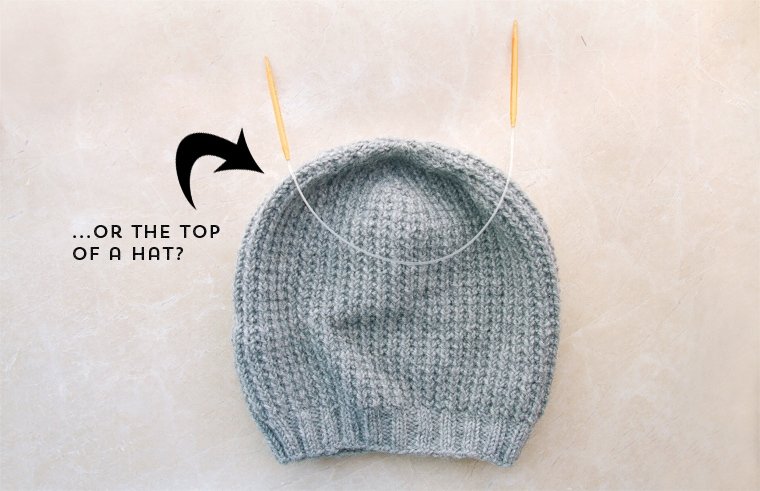
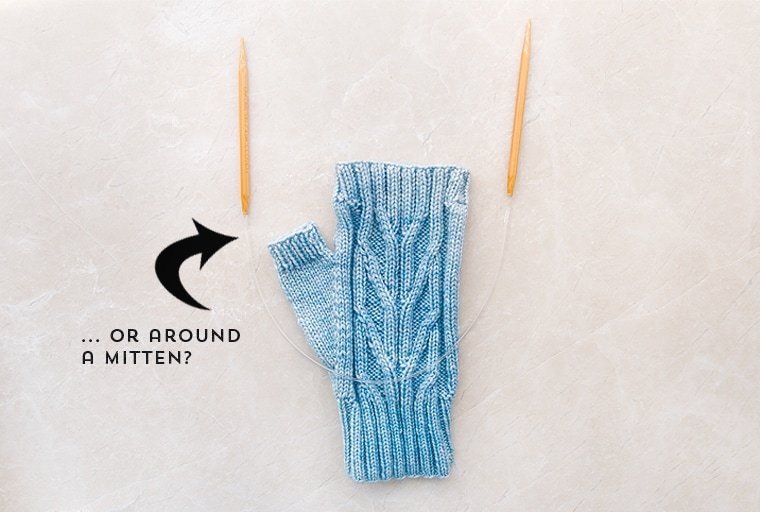
Circular needles can knit things that are larger than 16 inches in circumference (like the brim of hats and the body of sweaters). That’s because, traditionally, the smallest circular needles are around 16 inches.
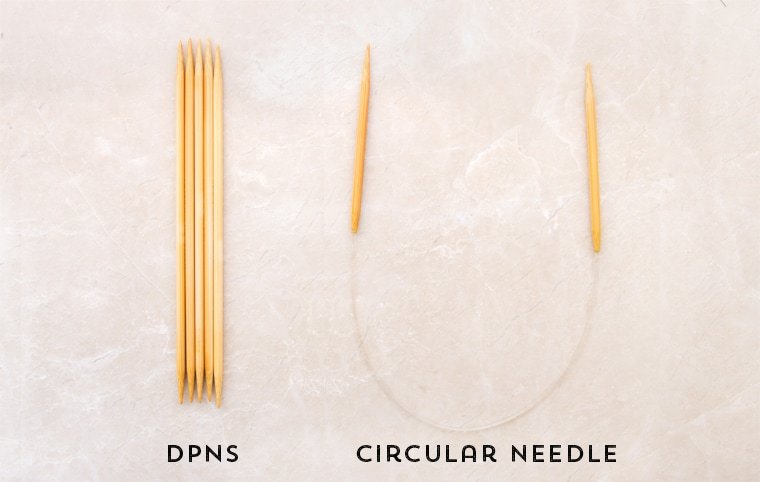
But lots of knitting things are smaller than 16 inches around. For instance: socks, mittens, the tops of hats, the sleeves of sweaters, you get the idea. These are all pretty tiny. For instance, how would you use a 16 inch circular needle to knit the fingers of a glove? Looks kind of impossible!
That’s where DPNs come in. With DPNs, you can knit the tiniest things in the round. Need to knit a sweater sleeve? Grab your DPNs. How about a pair of socks? DPNs to the rescue! These bad boys are specialised to knit small things in the round. Circular needles, in general, are meant for knitting larger things in the round.
To be clear, there are other methods for knitting small circular things (like magic loop), but for this post, we’re focusing exclusively on double pointed needles. Cool? Okay, let’s move on!
How Do Double Pointed Needles Work?
I’m going to bring out my favourite analogy for explaining double pointed needles: buses and trains!
You can think of knitting on circular needles like taking a train. You’re knitting around and around the needle in a big loop. You never “get off” the needle/train until you reach your “final destination” (aka. casting off). The knitting journey is fairly direct and stays on the needle/train at all times.
Knitting with double pointed needles is very different. Think of it like taking multiple bus transfers to reach your destination. You get on one bus/needle and ride a little way. Then you get off the bus and transfer to another bus/needle. You ride a bit more, and then get off to transfer to yet another bus.
Knitting on DPNs consists of a series of “bus” transfers, from one bus/needle to another. The journey is far from direct. You’re hopping on and off from bus to bus.
Thankfully, knitting with DPNs is far less exhausting than transferring from bus to bus all over town. It’s 100 percent less sweaty and a lot more fun. Ready to learn? Let’s do this!
Step-by-Step Double Pointed Needles Video Tutorial
If you’re a video learner, then this one’s perfect for you! This video tutorial goes through much of what I’ve covered in this post.
It will walk you step-by-step through the process of knitting with double pointed needles.
If you want to get straight into the tutorial, scrub ahead in the video to 1:46
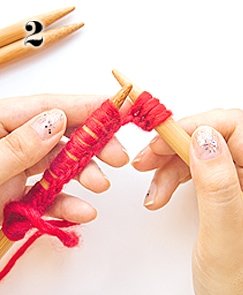
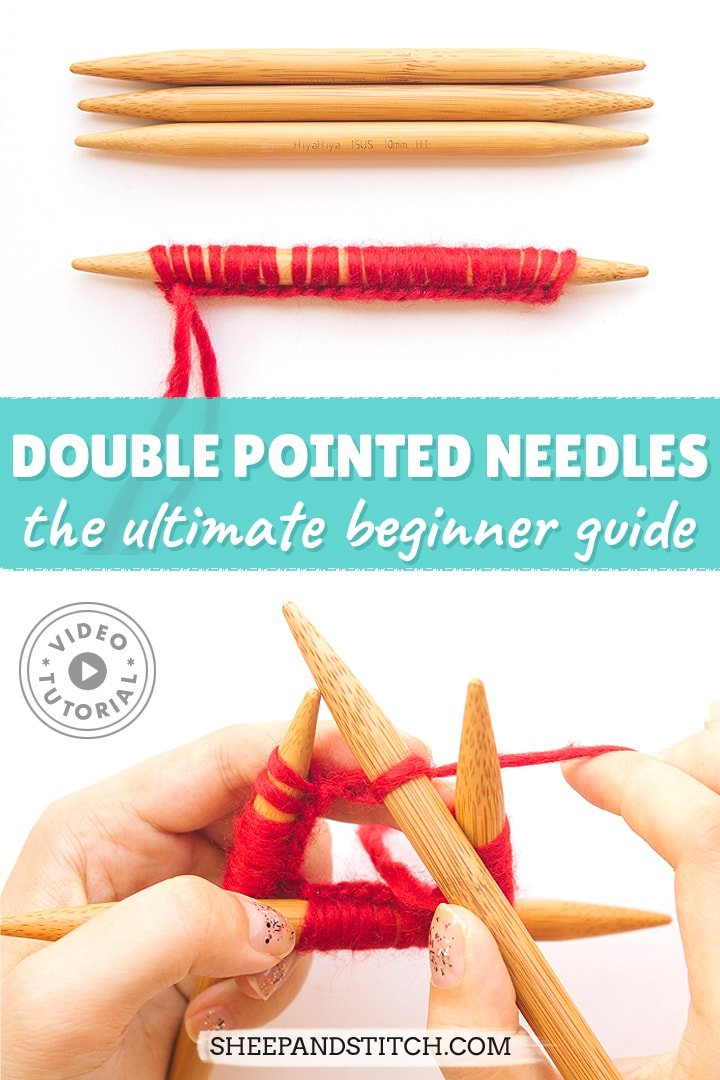
Step-by-Step Double Pointed Needles Photo Tutorial
Not everyone loves video, and that’s okay! I try to break down the steps for DPN knitting in this detailed photo guide. If you get confused on a step, refer back to the video. Chances are, it’ll be better explained there. Okay, here we go!
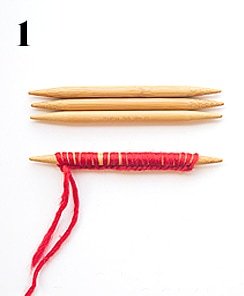
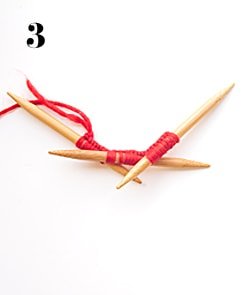
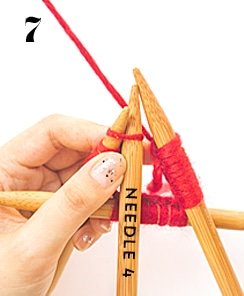

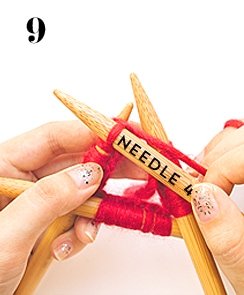
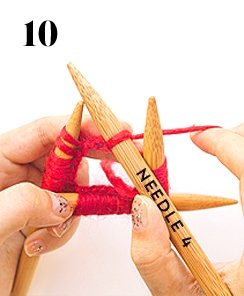
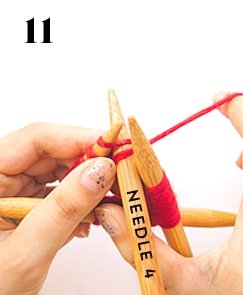
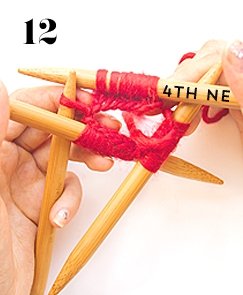
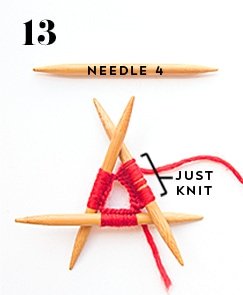
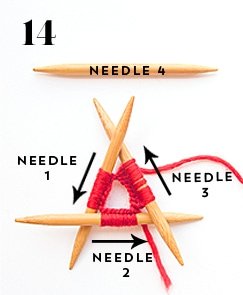
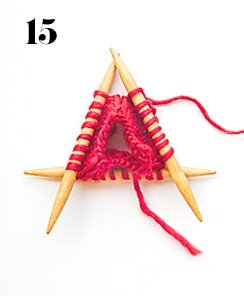
For reference, the yarn used in the photo guide above is Cascade Yarns Magnum in color Ruby and KnitPro Basix beech DPNS.
DPN Troubleshooting and FAQs
Q: How do I get the cast on onto the needle?
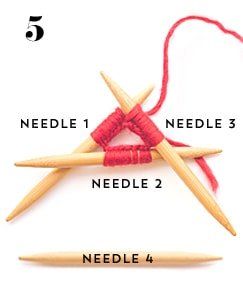
A: The first step is casting on to one double pointed needle. After you’ve cast on, you will divide the cast on stitches across three needles. Don’t know how to cast on? Check out my post on Casting on for Beginners
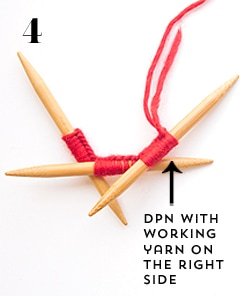
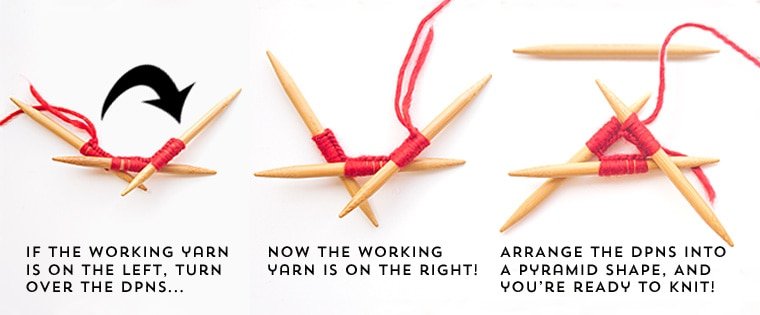
Q: How do you get the long tail cast on on the right side of the needle?
A: This is a common question, and I understand where the confusion comes in. When you’re casting on, the working yarn usually ends up on the left side of the needle. In order to get the working yarn on the right side, flip the DPNs from left to right. That’s it! Now the working yarn is coming out from the right needle.
Q: There’s a column of gaps/holes where the needles join. What’s going on?
A: Ah, the gappy columns. These are commonly called “ladders” in knitting parlance. They’re annoying, but not impossible to fix. The sooner you notice them, the better so you can close them up and make sure to never create them again.
Laddering is caused by loose, uneven tension. Oftentimes, moving from one DPN to another causes a knitter to loosen their tension. This looseness is what creates the gaps or holes in-between needles.
One method to fix laddering involves spreading the loose tension around to neighbouring stitches. By sharing the burden of gap-ness, it makes the gap less obvious.
If the laddering is not super noticeable, you may be able to block it out. Blocking, after all, forgives a multitude of (knitting) sins.
Q: How can I prevent laddering?
A: The best offence is a good defence. When you reach the last stitch on a DPN, tug on the working yarn before knitting into the first stitch on the next DPN. This will keep the tension tight as you move between needles.
Loose tension is what creates those gaps in the first place. So make sure to tug the yarn as you transfer from one DPN to another. Because I love naming things, I call this the “tug at the transfer.”
For more tips on working with DPNs, check out this blog post for my Top 5 Tips for knitting with Double Pointed Needles.
Did you enjoy this post? Did I miss anything? If you have questions or insights about your DPN journey, please leave them below. I love hearing from readers!

I wached knitting for beginners,and now I already can knit!!!!!
thank you
hI, I am super confused. Following a pattern for baby socks and am at the heels. the instructions say ” K8 turn work break yarn and attach new one, then P sts just knitted, then purl another 6.” I don’t understand how i do that with 4 needles… help!
just learned how to knit in the round. Very clear ! Thanks!
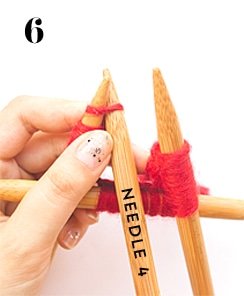
I have a pattern that calls for 4 needles to start. Do I use a 5th to begin knitting?
Yes! Use your fifth needle to knit into the stitches.
Thanks for an easy to follow video
You are such a wonderful teacher! The way you explain and demonstrate things, you truly have a gift. Thank you so much for the videos especially!
Wonderful. How do you knit in the round using circular needles. I want to knit leg warmers. Thanks
Hi – I have purchased a pattern which advertises knitting in the round using only straight needles ie stitches on 2 dpn, & a 3rd to knit with to create a tube for the beginning of a toy. I’ve played about trying this & think it’s using the 2 stitch holding DPNs & knitting i- cord style. Hi a VC e you ever get eard if this technique ? You start with 4 stitches, divide over 2 needles & kfb to 8 sts. Purl a row. Kfb again to 16 sts. Purl a row.
Any help would be greatly appreciated
thank you for easy to follow instructions and videos they are very much appreciated I can just about knit in a straight line now lol, seriously I’m so pleased to be able to Knit scarves and hats after watching your videos and following instructions thanks again
Thank you so much for including a photo tutorial! I may be a minority in my (young) generation, but I greatly prefer written tutorials to video ones. The pacing is never right for me to get it in a video!
This is definitely just me trying to avoid buying a whole set of DPNs, but is it possible to Frankenstein together one (16in) circular needle and one DPN?
Hi, and thank you for this clearly-illustrated tutorial. I have never quite been able to learn to knit this way without dropping stitches, but magic loop is not really useful for every project.
Where do you find such short DPNs? I clicked on “Affiliate Links” above but nothing happens.
Hi Sherry, Oops! You’re absolutely right. I forgot to put in the links. I’ve just updated them now and included three DPN sets I think are great for beginners. They are wood or bamboo, which makes them less slippery to work with.