5 Tips for Knitting with Double Pointed Needles
May contain affiliate links (what's this?)Double pointed needles are handy little beasts. In this post, we’ll cover how to knit with double pointed needles for maximum ease, neatness and… safety? Yes, safety! These five knitting tips will improve your knitting game and transform you from a competent DPN knitter to a bona fide DPN wrangler.
Watch the full video below or read through the tips on your own. Let’s do this!

If you’re new to double pointed knitting, check out the ultimate guide on double pointed needles for beginners.
Tip 1: Tug at the Transfer
When you’re moving from one DPN to another, make sure to tug at the transfer. This prevents loose tension and gaps forming between the DPNs.
How to do this? Easy-peasy!
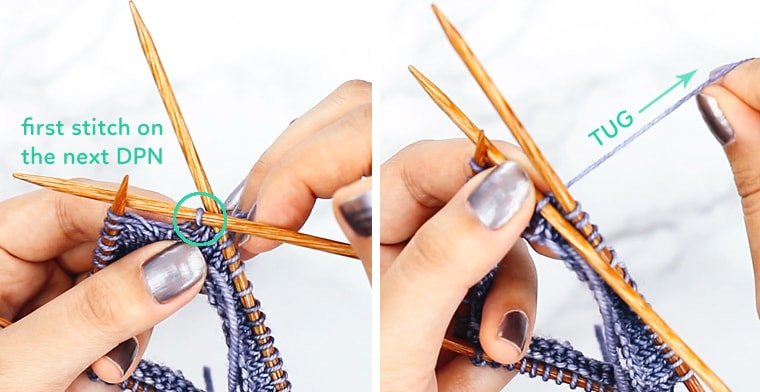
When you work the next DPN, knit into the first stitch and give the working yarn a firm tug to ensure there’s no looseness between the first stitch and the last stitch on the previous DPN.
After tugging at the transfer, knit all the stitches on your DPN and repeat the tug at the transfer when you move to the next DPN. That’s it!
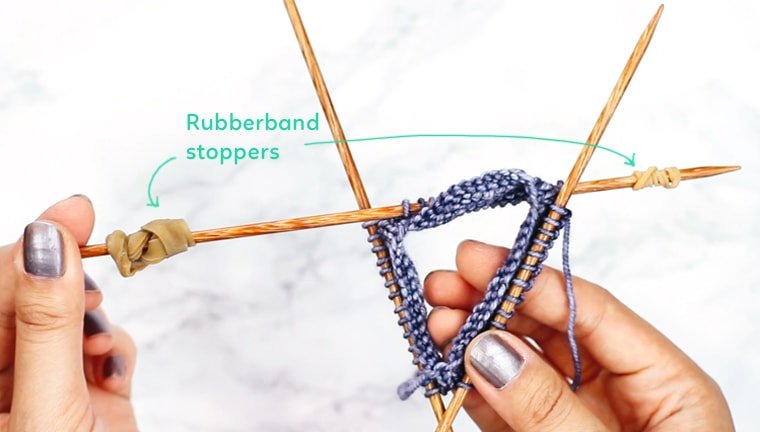
Tip 2: Protect Your Stitches
If you plan on bringing your knitting out and about, then make sure to use stitch protectors. Because DPNs don’t have stoppers on either end, it’s easy for stitches to fall off the needle Disaster!
You can protect your knitting by placing a temporary stopper on each end. You can buy fancy needle stoppers for a couple bucks or make your own using rubber bands. Grab a couple rubber bands and tie them onto the ends of DPNs. Instant stopper!
Tip 3: Bamboo or Wood is Good
If you’re new to DPN knitting and wondering what kind of needles to get, consider bamboo or wood.
I find bamboo and wooden needles great for beginners because they have a natural surface drag that holds onto stitches better than metal or plastic needles.

Tip 4: Trap a Stitch Marker (If You Want To)
If you want to insert a stitch marker to mark the beginning and end of the round, you can certainly do so. However, the stitch marker will likely fall off. Like this:
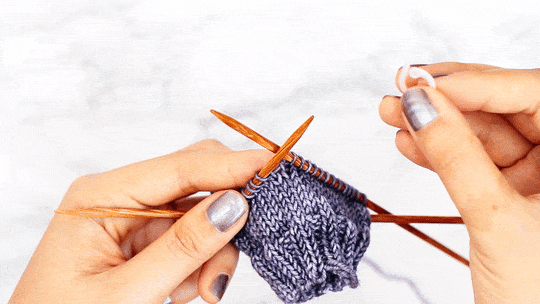
This happens because there’s no stitch on the other side of the marker to keep it in place. Thankfully, there’s an easy fix.
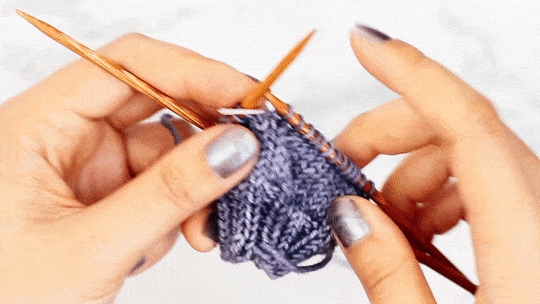
We can take one stitch from the DPN on the right and transfer it to the needle with our marker, thereby sandwiching the marker in place.
Tip 5: Make an Invisible Join
When joining in the round, a small gap can form at the join. While annoying, it’s not a big deal. You can always close the gap with leftover cast on yarn.
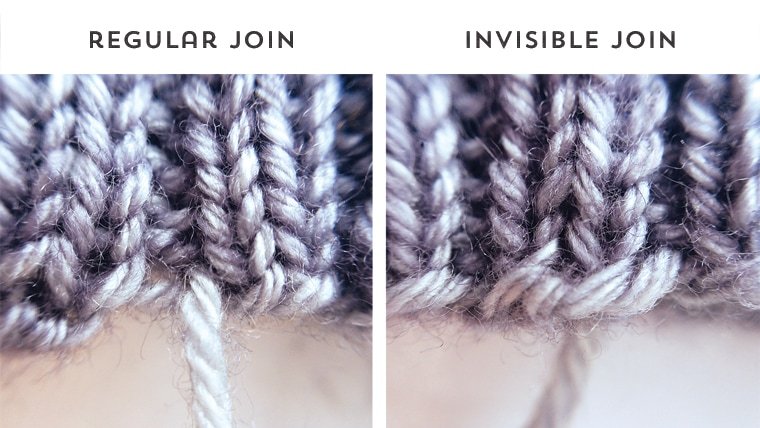
However, to save time you can create a smooth invisible join after casting on. Just follow these steps:
- Cast on one extra stitch than what you need. For example, if you need 30 stitches, cast on 31 stitches (30+1=31)
- Get ready to join in the round. Push the stitches on the right and left DPNs close to the tips of the needles
- Slip the first stitch on the right needle to the left needle
- Bring the second stitch on the left needle over the first stitch (the one that you just slipped over)
- Slip the first stitch on the left needle back to the right needle. You’re now ready to knit in the round!
If you look closely at your join, you’ll notice that you’ve already joined in the round. If you count up all the stitches, you’ll see that the extra cast on stitch has disappeared. It’s was absorbed into the join when you slipped the second stitch over the first stitch on step 4. Such magic!
If you find these steps confusing, check out the video up top for a demo. The invisible join starts at the 5:19 mark.
This wraps up my five best tips for knitting with double pointed needles. If I missed a tip that you use and love, please share it down in the comments!