Rib Knitting for Beginners: 1×1 and 2×2 Rib Tutorial
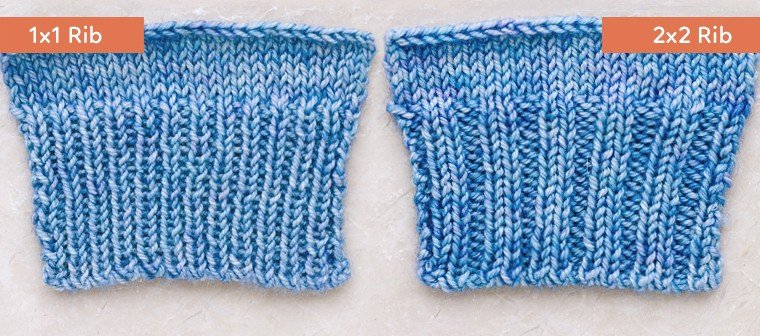
May contain affiliate links (what's this?)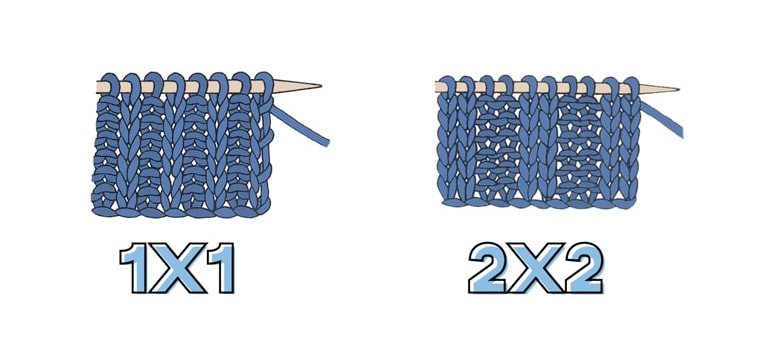 Rib knitting is perfect for projects that need stretch. Think: the brims of hats, sleeves of sweaters, and cuffs of socks and mittens. When you need stretch, look to rib knitting!
Today, I’ll walk you through the two most popular rib stitches: the 1×1 and the 2×2 rib.
Both these rib stitches use knits and purls to make a very stretchy rib. Both are also perfect for beginners who are just getting used to knitting and purling.
Master rib knitting, and you’ll have a really useful knitting technique for all your future projects. Below, I’ve got a full video tutorial in addition to written instructions. Let’s get into it!
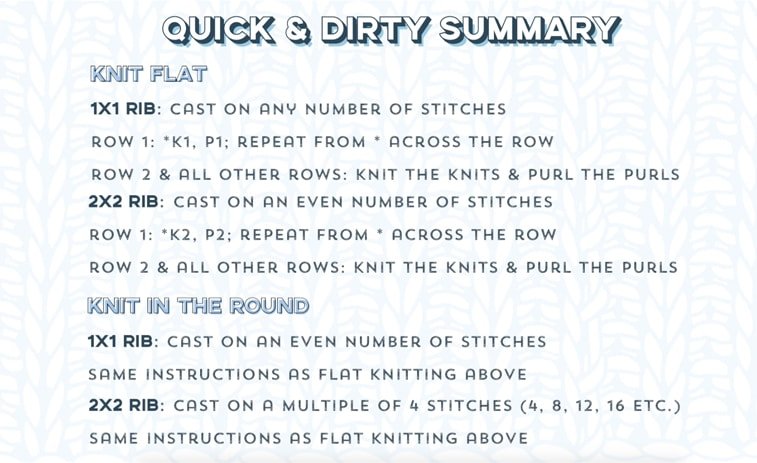
1×1 Rib Knit Flat:
Cast on any number of stitches
Row 1: *knit 1, purl 1; repeat from * to the end of the row
Row 2 and all other rows: knit the knit stitches and purl the purl stitches
Repeat Rows 1-2 until knitting is the length you like.
2×2 Rib Knit Flat:
Cast on an even number of stitches (ie. 2, 4, 6, 8, 10…)
Row 1: *knit 2, purl 2; repeat from * to the end of the row
Row 2 and all other rows: knit the knit stitches and purl the purl stitches
Repeat Rows 1-2 until knitting is the length you like.
1×1 Rib in the Round:
Cast on an even number of stitches (ie. 2, 4, 6, 8, 10…)
Round 1: *knit 1, purl 1; repeat from * to the end of the round
Round 2 and all other rounds: knit the knit stitches and purl the purl stitches
Repeat Rounds 1-2 until knitting is the length you like
2×2 Rib in the Round:
Cast on a multiple of 4 of stitches (ie. 4, 8, 12, 16, 20…)
Round 1: *knit 2, purl 2; repeat from * to the end of the round
Round 2 and all other rounds: knit the knit stitches and purl the purl stitches
Repeat Rounds 1-2 until knitting is the length you like
Step-by-Step Video Tutorial
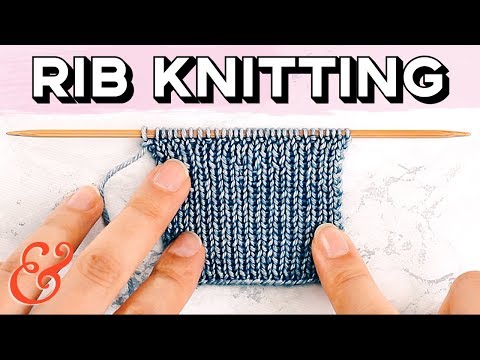
Sometimes you need to watch a vide to really “get it.” If that’s you, then watch the tutorial above for a detailed play-by-play on rib knitting.
Ribbing is at its best when it’s stretchy. The best way to get a tight and stretchy ribbing is by knitting with a pair of smaller needles. The tighter tension ensures a snappy, stretchy fabric.
For at-a-glance instructions for rib knitting, enjoy this cheat sheet:
My Favourite Rib Cast On
One of my favourite cast ons for rib knitting is the alternating cable cast on. It’s perfect because the ribbing looks like it’s growing out of the cast on – like there’s no cast on at all!
It’s stretchy and looks the same on both sides, making it perfect for hats with turned-up brims.

This is a slightly more advanced cast on, so if you’re brand new to knitting, I wouldn’t recommend it yet. However, if you’re comfortable casting on and knitting, then give the alternating cable cast on a try!
Hello. I want to switch from 2×2 ribbing to a stockinette stitch. How do I do that? Is it possible? Please help🥺.
from my experience, you just finish your ribbing, and just start knitting your stockinette stitch. I’ve done the knit stitch first successfully across, and then purling the next row, but you may find it easier to purl first!