What is Knitting Gauge? (And Why You Should Care)
May contain affiliate links (what's this?)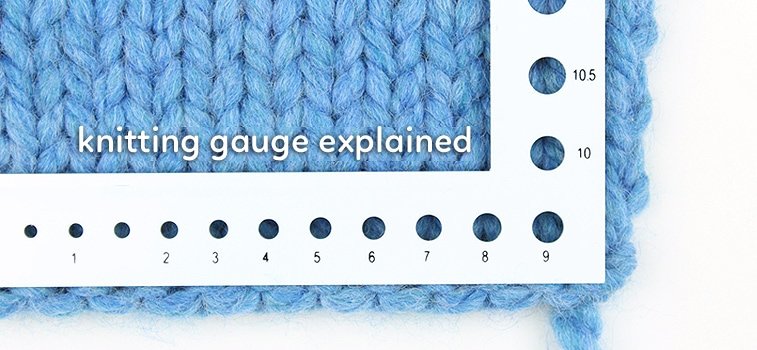
Knitting gauge is one of the most important knitting concepts to understand. It’s the difference between garments that fit and garments that are disastrously too small or too large.
Someone who understands knitting gauge has a world of well-fitting sweaters, mittens, socks and more at their fingertips!
In this post, we’ll go over what gauge is, why it’s important, and how to get it so that you can knit things that fit.
Table of Contents
Knitting Gauge Video Tutorial

Unlike machines, we humans have unique quirks and tendencies, and this extends to our knitting. That’s why two people who are knitting the same pattern with the same yarn and the same needles can end up with two different-sized pieces.
It all boils down to tension, or in other words, how tightly you knit.
So, you can imagine the problems that arise for a pattern designer. How can she account for every knitters’ tension so that both the tightest and loosest knitter can knit the same pattern in the same size and end up with identically sized garments?
You guessed it – with gauge! Think of gauge as a way to measure tension.
What is Knitting Gauge, Exactly?
So, let’s dissect a knitting gauge together. A typical knitting pattern will include gauge instructions that look something like this:
Gauge: 10 sts/15 rows = 4 inches in stockinette stitch
This means that if you knit 10 stitches for 14 rows in stockinette stitch, these stitches should measure 4 inches in width and height. This piece of knitting is called a gauge swatch.
If your gauge swatch matches the gauge of your pattern, then you’ve achieved the correct gauge (or, tension) that your pattern requires. Now you can start knitting. Woohoo!
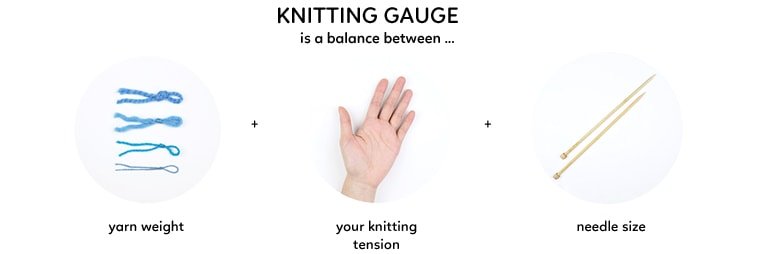
But, let’s back up a bit. Gauge is a balancing act that involves three things:
- Needle size
- Yarn weight
- Your knitting tension
You can’t change your knitting tension. It’s unique to you, and flows naturally from your fingers. So unless you’re pulling your yarn in a death grip or knitting so loosely that you’ve got holes in your fabric, embrace your knitting tension. It’s yours and yours alone!
So, knitting tension you can’t control. But you can experiment with the two other variables:
- Needle size
- Yarn weight
Your knitting tension
Both needle size and yarn weight can be changed, and you can play around with them to get gauge for your pattern.
How Do I Knit this Gauge Swatch?
First: choose a yarn and a needle size that you’ll potentially use for your pattern. Most patterns will have a recommended needle size and yarn weight. Use these as a starting point.
Then, it’s time to cast on. The rule of thumb is to add a few extra stitches onto your gauge swatch. Our hypothetical gauge asks for 10 sts and 15 rows in stockinette.
Rather than cast on exactly 10 stitches, let’s cast on 16 stitches and have three stitches bracket our 10 stitches on each side. You can mark off your stitches with markers. Like this:
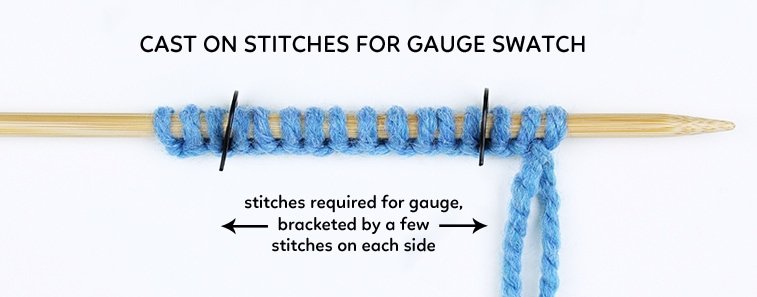
Adding a cushion of extra stitches gives a more accurate reading. It’s also easier to measure.
Now, let’s knit in stockinette stitch! Rather than knit exactly 15 rows, let’s knit 20 or so rows. Once you’re done, get your measuring tape out.
Let’s Measure This Gauge Swatch!
So here’s the moment of truth. Does your gauge swatch match the pattern’s? Oh, the suspense!
But wait!
A possible delay: If you want to be super accurate about your gauge, then you’ll need to follow this extra step.
It’s not “mandatory,” but if you’re knitting a garment that needs precise sizing or if you’re a perfectionist, then you’ll want to stick around for this next bit.
Blocking a Gauge Swatch
For a super accurate gauge, you’ll want to wash it. Yep. Wash it. Treat this swatch as if it were a mini-me of your final yet-to-be-knitted project.
If you plan on hand washing your finished garment, then hand wash the swatch. If you plan on machine-washing it, do the same for your swatch. Then, set it aside and let it dry naturally overnight.
The idea is that you want an accurate measurement of how your knitting will react in the “real world” after it’s been washed and worn. Once you’ve blocked the swatch, you’re ready to measure.
Measure the Gauge Swatch
Okay, back to regular programming. You’ve got your gauge swatch. Now, let’s measure it!
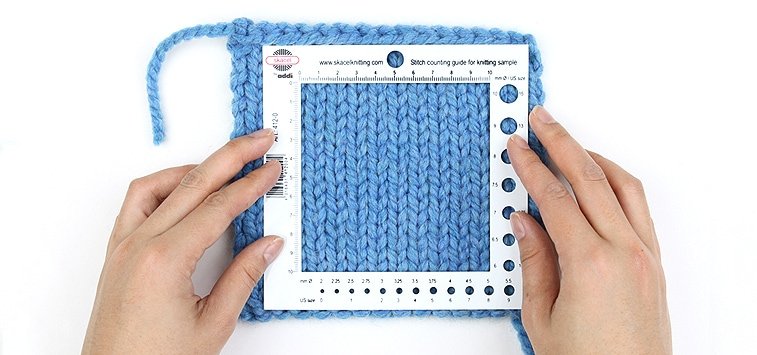
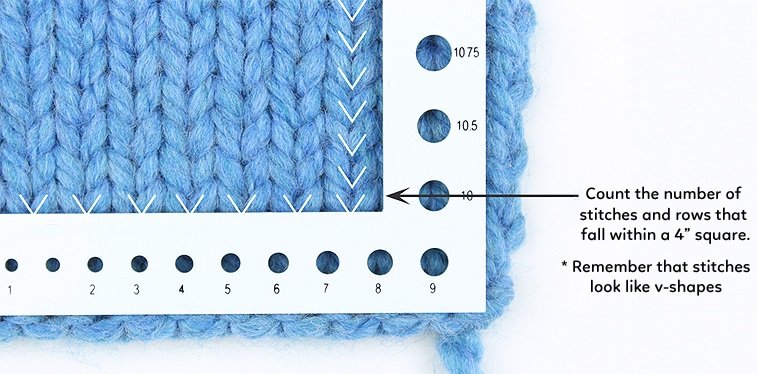
Let your swatch lay flat and, without pressing or stretching it too much, measure out 4 inches. Then count the stitches within that 4 inch range. Do the same for the rows.
So? How’d it go?
Here, I’ve got a handy gauge ruler that makes measuring easier, but you can do the same with a regular tape measure.
In this example, I’ve got 9 stitches and 15 rows that make up a 4 inch square. My gauge is a bit too loose. I need to tighten it up.
My Gauge Swatch is Too Small/Large. What Now?
Okay, don’t panic. Let’s return to our hypothetical pattern gauge from above:
Gauge: 10 sts/15rows = 4 inches in stockinette stitch
Let’s say you measure out your gauge swatch, but it’s only 3.5-inches in width and height. It’s too tight!
What do you do? You’ve got two options. You can either switch to a larger needle size or use a heavier weight yarn.
Option 1: Change Your Needle Size
By switching to a larger needle, you automatically loosen the tension of your knitting. As a result, you gauge grows in width and height. That 3.5-inch gauge swatch may fill out to 4-inches once you increase the needle size.
It’s a good idea to start increasing needle size in increments of 0.5mm. For example, if a 4mm needle gives you a gauge that’s too tight try a 4.5mm needle. If that’s still too tight, try 5mm.
This also works in reverse. If your swatch is too loose, try decreasing your needle size in increments of 0.5mm.
Knitter Beware: If you increase or decrease your needle size dramatically, you can end up with a fabric that meets the correct gauge (awesome!) but is too tight or too loose (boo!) If you can’t live with the fabric that your gauge has produced, then it might be a problem of yarn weight. Move on to option 2…
For more information on needle sizes and conversions, check out this needle size post.
Option 2: Choose a Different Yarn Weight
Instead of changing your needle size, you can use a heavier or lighter yarn weight to get gauge. If the concept of yarn weight is confusing, check out my post on yarn weights.
In our example, the gauge swatch is too loose. Let’s say we used a chunky weight yarn to knit it. To tighten the tension, we can move down one rung in the yarn weight ladder and try a heavy-worsted weight yarn.
Knitter Beware: As with option 1, if you choose a dramatically different yarn weight than the one specified in the pattern, you may end up with a too-tight or too-loose fabric.
Ultimately, gauge is about experimentation. Start with the pattern’s recommended needle size and yarn weight. If these don’t get you the right gauge, try different combinations.
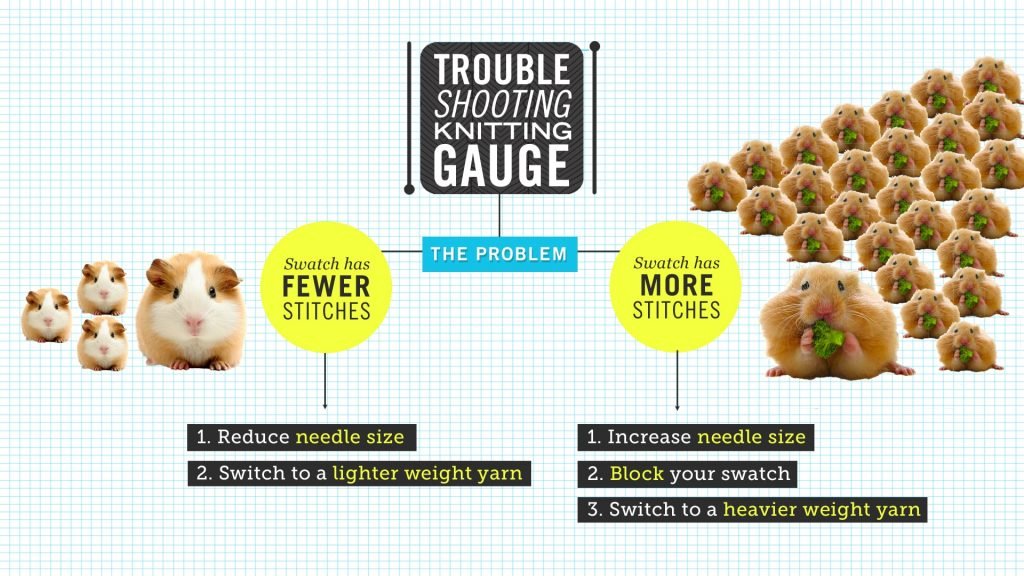
Here’s a quick cheat sheet for troubleshooting gauge from the video up top:
Click This: My Guide on the Yarn Weight Family
I Got Gauge. Can I Start Knitting?
You’ve got the right combo! Needles, yarn, and your own knitting tension are working in beautiful harmony. You’re on the same gauge wavelength (gauge-length?) as the pattern.
The search for gauge is over! Do a happy dance and start knitting your pattern!

Side note: I’ve heard “gauge” pronounced an assortment of ways, from “gouge” (as in gouge out an eye) to “goodge” (a mix between goo and sludge).
General consensus seems to settle around a pronunciation that rhymes with cage. Think: “gage.”
(ETA: Thanks to Stacey in the comments for pointing out my tendency for mixing up “loose” and “tight” when talking about gauge.)

that was a great explanation of gauge and the addition of how to pronounce it really blew my mind!
thank you very much!
You’re very welcome! I’m glad it helped!
You can also affect your tension somewhat by changing the needle material. Slippery yarn/ slippery yarn produces different gauge than the same yarn with needles that have more friction, and again changing to a different yarn might affect to the end result.
This is true! Great tip!
I was supposed to write slippery yarn/slippery needles…
I love your charts and info. I usually know what I’m doing, but a quick chart always makes me feel more secure. Thanks so much
What a great article.Have tried to explain the need for tension check to many of my fellow knitters.You have written fantastic article
Hi Davina!
This is an awesome and very helpful guide, with exactly the appropriate amount of fun!
I’ve only got one question: If I wash and block the swatch, can I unravel it and use the yarn from the swatch to start the actual project (I’m using 25% wool & 75% acrylic yarn, if that’s relevant)
Thanks in advance for your answer,
G.
Hi Davina!
Thanks for this post, it’s very helpful! I’ve only got one question: If I wash and block the swatch, can I unravel it and use the yarn for the actual project afterwards?
Thanks in advance for your answer,
G.