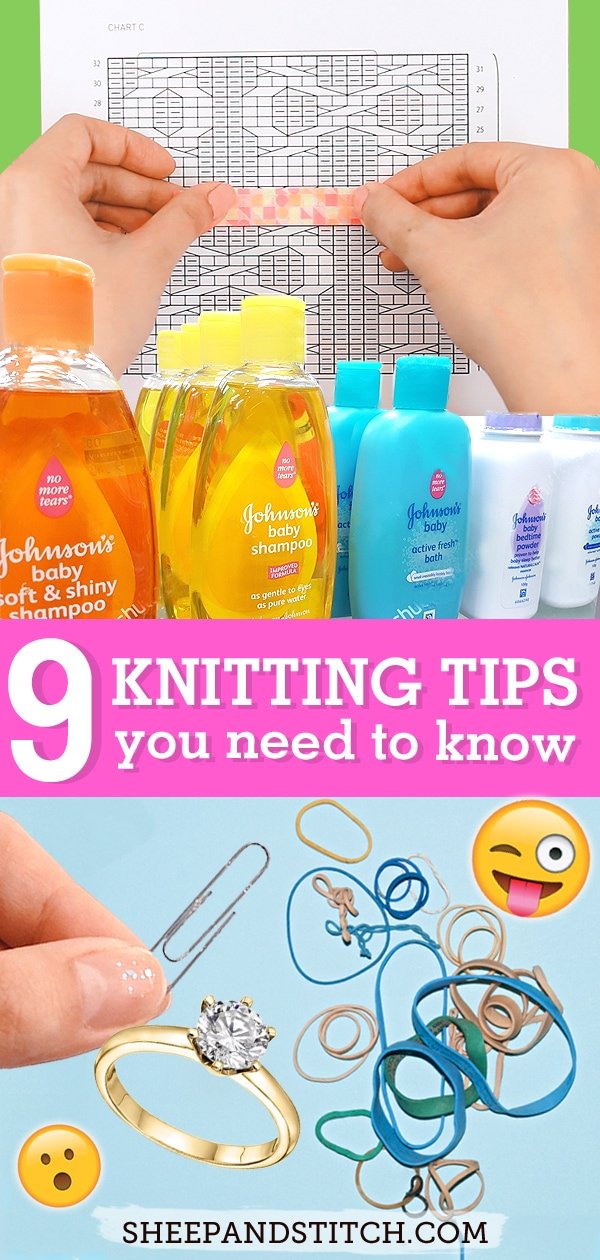
9 Knitting Tips You Need to Know
May contain affiliate links (what's this?)
I’ve been knitting for over 15 years, and during that time I’ve benefited from a lot of shared knitting tips and tricks.
Some were borne out of a combination of desperation and ingenuity. Others were passed down from older and wiser knitters.
Still others I picked up from the chatty hubbub of internet forums, comment sections and in-person knitting circles.
I’ve used each knitting tip countless times, and they have served me well. Go forth and let them power up your knitting game!
If you’d like to watch me gesticulate wildly while going through these tips, watch the video above. Otherwise, scroll down to read each tip.
Let’s get into it!
1. Stitch Markers are Everywhere
Chances are you’re surrounded by stitch markers right now.
That paperclip on your desk? It can be twisted into a split-ring stitch marker
Rubber bands? Rings? Hair ties?
All stitch markers waiting to be put to use!
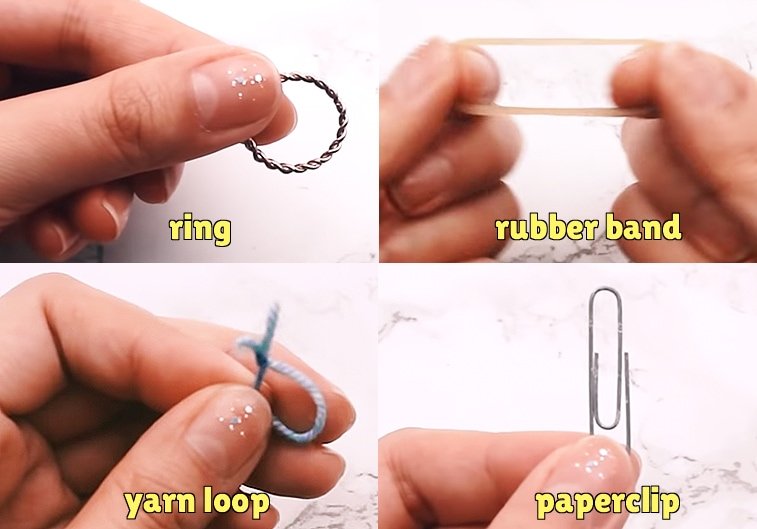
Get this:
If you have a bit of scrap yarn, you can cut off a 6” piece, twist it into a loop and knot it at the ends.
Instant stitch marker!
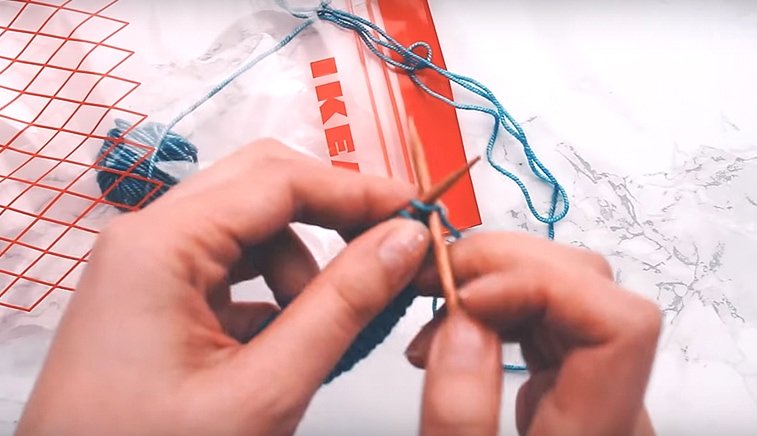
2. A Cheap and Easy Project Bag
Yes, you can splurge on a leather or waxed canvas project bag with gleaming brass hardware and the smoothest zipper that moves like a knife through soft butter.
Sure, you can do that. I would be incredibly jealous of your project bag, and would likely stroke it longer than appropriate.
But for those of us who can’t splurge on a luxury bag, a humble Ziploc bag gets the job done.
Just poke a hole through one side of the Ziploc bag near the zip.
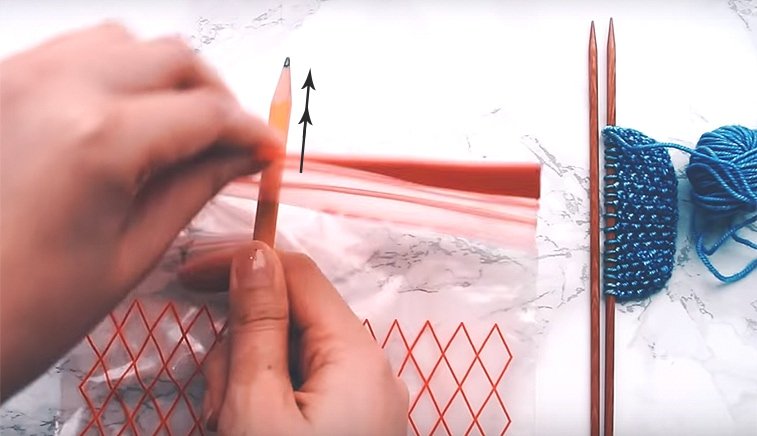
Then, make a cut from the top of the bag to the hole you just poked.
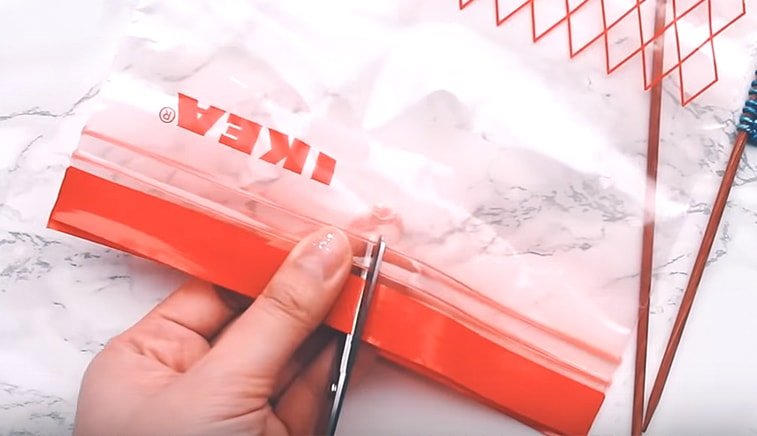
Feed the yarn through the hole, close up the zip, and you’ve got yourself a cheap and slightly waterproof project bag!
3. Oh, Baby! You’ll Love this Knitting Tip
Your well-loved knitting is going to get dirty at some point.
To wash it, you don’t need to buy special wool soap.
Instead, try a squirt of baby shampoo in a bit of lukewarm water.

Soak your knitted item in the shampoo-water mix. Then, rinse it in lukewarm water and lay flat to dry.
You might be wondering, why baby shampoo?
Seems a bit random, right?
According to the baby shampoo Wikipedia page, baby shampoo has a pH of around 7, which is more alkaline than soaps formulated for adult skin and hair.
Baby shampoos are also often diluted to make it sting less if the product gets in baby’s eyes. So, it’s safe to assume that baby shampoo is less harsh than shampoo for adults.
Furthermore, an ideal environment for wool to be washed is at a neutral pH of 7. So, baby shampoo, with its neutral pH, fits the bill!
You can always buy a wool soap, but I’ve found that baby shampoos work just fine.
4. Keep Your Charts Organised
When you’re knitting a chart, it can be easy to skip a row or two and get totally lost.
Trust me – I’ve been there.
To keep organised, I like to use a post-it note or washi tape to cover the rows I’ve worked. As I knit each row, I move the post-it note up the chart.
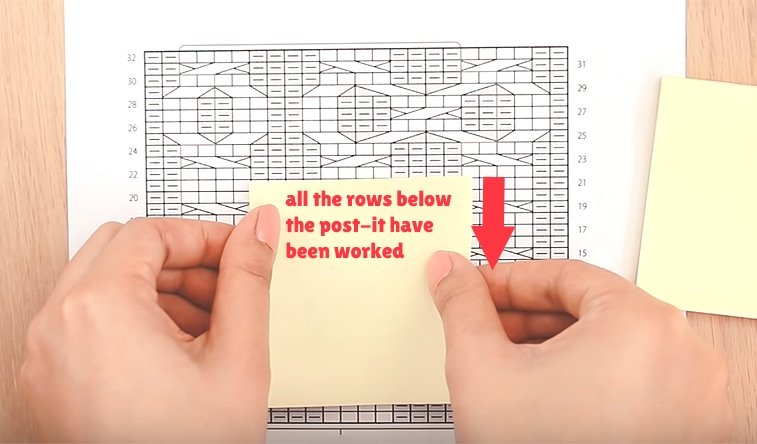
The row that’s directly above the post-it note is the row that I need to work. All the rows covered by the post-it note are rows that I’ve already knit.
Just remember:
The rows that are visible need to be knit, and the rows that are covered are done.
5. Never be Without Your Pattern
If you bring your knitting out with you, you may also need to keep a knitting pattern close by.
You need to get in a couple rows while waiting in line at the bodega, right?

Keep your pattern at your fingertips by taking a photo of it on your phone, sending it to the cloud or emailing it to yourself.
Where your smartphone is, there your pattern will be!
(And in this day and age, our smartphones are basically a third appendage!)
6. Skip Weaving in Ends
Finishing a knitting project is a cause for celebration!
But if you’re anything like me, the last step of weaving in ends feels anti-climactic and puts a damper on the celebratory mood.
The good news is that you can weave in ends as you knit, thereby avoiding the need to break weave in ends once a project is done.
Here’s how it works:
When you join in a new strand of yarn or finish casting off, just grab the yarn tail that you’ll need to weave and hold it together with the working yarn.
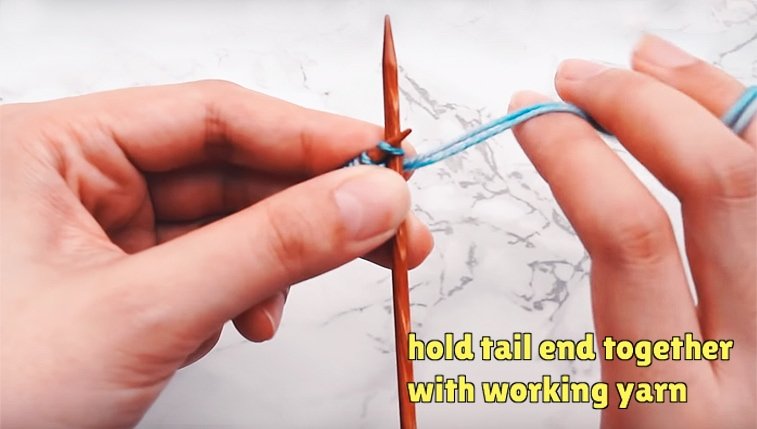
Then, just knit into the first four or five stitches with the yarn tail held together with the working yarn.
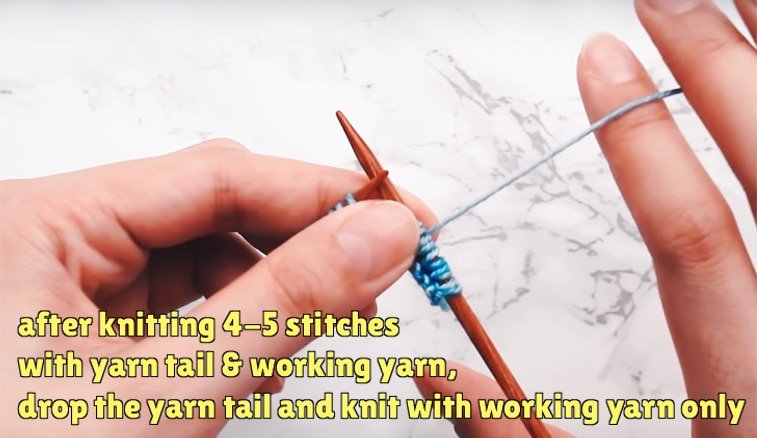
The yarn tail will be integrated beautifully with the knitting. After knitting four or five stitches, drop the yarn tail and continue knitting with the working yarn.
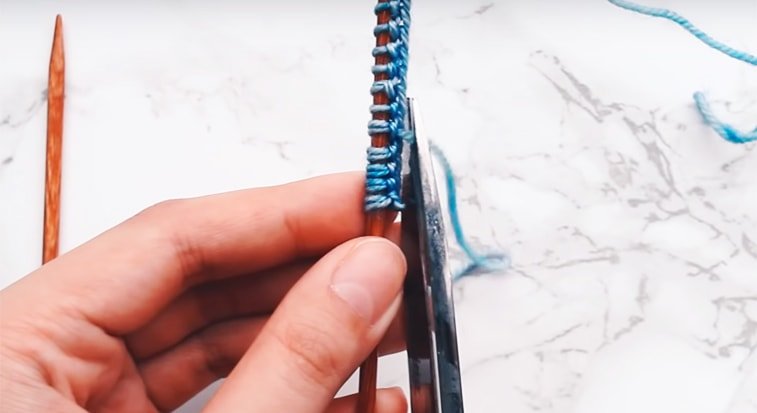
Snip off the yarn tail and you’re done. No tapestry needle needed!
7. Straighten out Those Curls
If you’ve ever unpacked a pair of long circular needles, you might notice that the cables are incredibly curly and out of control.
This is because the cable has “set” after sitting in its packaging for a long time.
To un-curl the cable, get the largest pan you can find. A big roasting pan is best.

Boil up a pot of water and pour it into the pan.
Then drop your needles into the pan and watch them un-curl.
The heat will relax the nylon cable, softening the curl and straightening the cable.
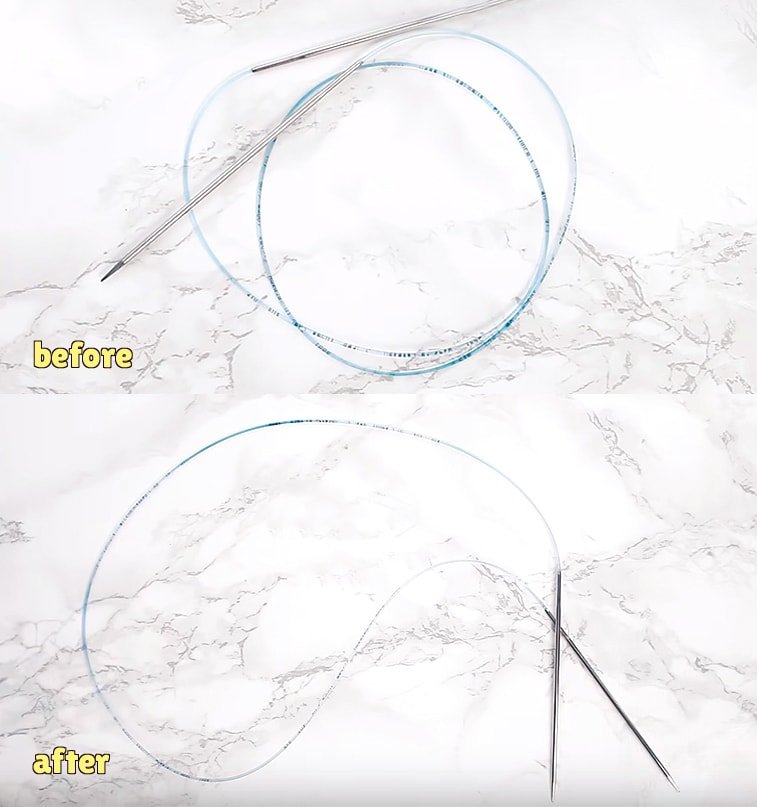
Voila! A straight and smooth cable.
Hot Tip: If you’re worried about the join between the cable and needle getting loose from soaking, you can leave the needles out of the pan. Just let them hang out off the side of the pan.
8. A Ruler at Your Fingertips
Need to measure your knitting on the fly?
Get your finger involved!
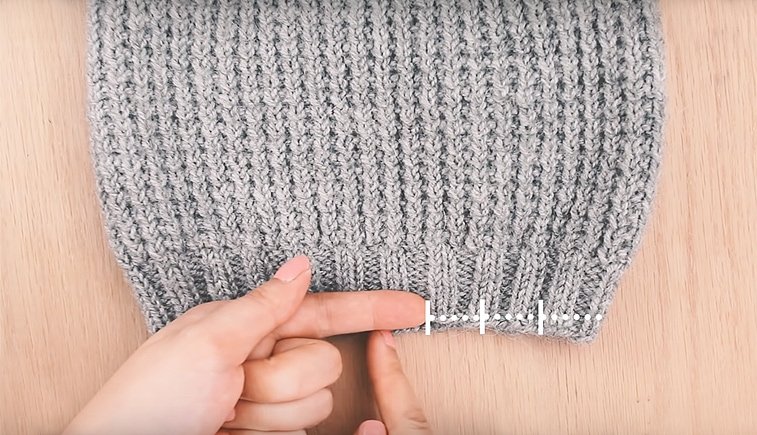
The space between your index finger and the join is roughly one inch.
So, the next time you need to measure by the inch, whip out your finger and get measuring!
9. No Tears Long Tail Cast On
If you’ve ever cast on with the long tail cast on, you know that you need to estimate the amount of yarn you’ll need before casting on.
There are ways to guess the amount of yarn needed, but I’ve never found a method that was truly accurate.
More often than not, I ended up ripping out the cast on because I had too much or too little yarn. It was maddening!
But – no more.

Above, you’ll find a fool-proof way to long tail cast on without doing any yarn estimation at all.
That’s right – no yarn estimating!
The trick is in using two strands of yarn to cast on instead of one. It’s genius!
Now, It’s Your Turn
Now I’d like to turn it over to you:
What’s the #1 knitting tip from this post that you want to try?
Are you going to start casting on with two strands of yarn? Or hunt down potential stitch markers in your home?
Let me know by leaving a comment below.
And if you’d like to save this post for later, make sure to pin the image below!


Hi Davina, I LOVE your website – it finally got me learning to knit! I’ve done scarves, hats, etc, but am working my way up to a baby sweater. I noticed you don’t have any patterns for it but do you have any videos/patterns you recommend for a beginner? There’s a ton out there but I love the way you do your videos and thought I’d see if you have a favorite! Thanks so much!
I am always happy to share my knitting hack. Has he been invited to a work-related BBQ this past summer and knowing it was a family event, I had concerns about bringing my knitting. Between the sand and little barbecue fingers and spilled drinks I was concerned about ruining my project. I have the tendency of thinking outside the box and walked around the house looking for a viable container and found a plastic pitcher. The pitcher had a cover and was a 2 quart pitcher so it could hold a skein of yarn and feed the yard through the spout and instant portable yarn bowl. After a very relaxed event because nobody was worried about my yarn and projects, I decided to invest in some more “plastic yarn bowls”. I found a large assortment at Dollar general and decided to go with those instead of the thrift store which were $0.88. I made sure that I got the style with the open handles so they fit into one another but also became a hanger for the pitcher. Having and open handle, I could hang the pitcher from the beverage cup holder on my chair. I found this to be a win-win because I could still enjoying my friends and coworkers, still knit, and not be yelling at kids all day long to stay away from my knitting and yarn. I have shared this with many people and hope you will too. I do have pictures but not sure if I can upload them here come see if you would like the pictures please contact me either through Facebook or my email address which is annknits@gmail.com
I’m new here and I can knit. I’ve never seen it done that way but I’m practicing the long stitch cast on and it looks like it’s getting twisted. What am I doing wrong??
Loved the hacks and will use several of them. I had a very slinky yarn and was struggling to keep it contained. It came unbaled several times and then had to be untangled. I needed to find a better solution after the third time I had to recall them, 11 of them. They were small balls which I put into snack zip locks until I needed them and then put then in a coffee to go cup to knit. The yarn, aka, ribbon, feed nicely thru the drink hole and didn’t tangle while knitting. It also was really portable and the cup kept it clean. It was a bit of a tight squeeze in the beginning but that didn’t last long.
Hi Davina,
Can you post a pattern of leg warmers?
Thanks!
Hi , I’m somewhat new at knitting an so glad I found your videos which are a joy to watch an easy to learn from thanks so. Much I can’t wait to try your long tail cast on back. Have a great day
You are the best teacher, really!!! I’ve looked at many videos and am so impressed with your teaching ability. You stand above all the rest! Thank you. Keep posting!
Thank you for your knitting tips. It makes sense that it is important to maintain organized charts. I think it would also be crucial to invest in quality knitting tools and materials.