• Skip to primary navigation
  • Skip to main content
  • Skip to primary sidebar
  • Skip to footer

Sheep and Stitch

Knitted goodness made by you

  • About
  • Start Here
  • Patterns
  • How To Knit
  • Knitting Library
  • Blog

Learn How to Knit a Potholder (with leftover yarn!)

Published on December 16, 2022 By Davina | May contain affiliate links (whats this?)

A knit potholder is a great gift for housewarmings or for people who love to cook. This potholder is made with chunky yarn, but any yarn that’s worsted weight or heavier can be used.

Just remember to use a yarn that is spun with natural fibres. For instance, wool, cotton, hemp or alpaca. Synthetic yarns like acrylic or polyester run the risk of melting if the pot that’s placed on it is too hot!

Knit Potholder Video Tutorial

Watch the above video for a step-by-step tutorial on how to knit the potholder.

Project Time: 2-3 hours

Materials:

  • 50 yards of chunky yarn
  • 6mm double pointed needles (or circular needles)
  • tapestry needle
  • scissors
  • sewing needle
  • sewing thread in a color that matches the yarn
  • small piece of leather (optional)
  • sewing thread that matches the leather (optional)

Knit Potholder Instructions:

With double pointed needle, cast on 3 sts

Knit 3 sts

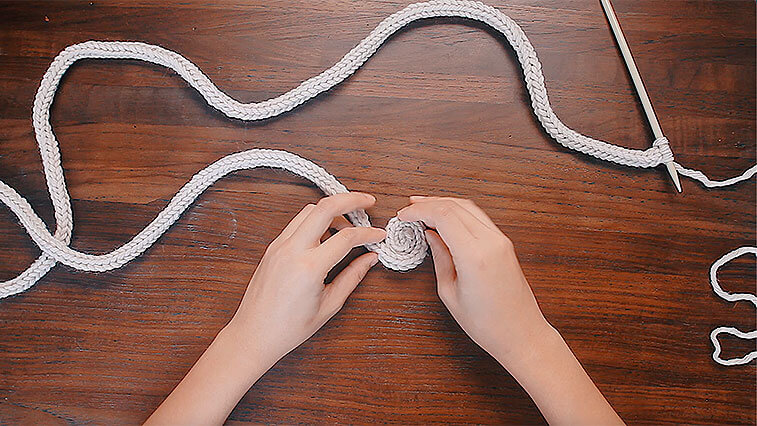
*Do not turn the needle over. Instead, push the stitches to the right side of the needle so that the working yarn is coming from the last stitch. Knit 3 stitches; repeat from * to create an i-cord.

Watch the above video tutorial for a demonstration on how to knit an i-cord and how to seam it together.

knitting a potholder
When knitting an i-cord make sure the working yarn comes from the last stitch

Knit the i-cord until it is 66” or 2” length than your desired length. Then, K2tog, K1 to decrease the i-cord to 2 sts.

knitting an i-cord
As you knit the i-cord, coil it around itself to estimate the finished size of the potholder

Continue to knit the i-cord for 2” more. Then leave a 6” tail and cut the working yarn. Weave the yarn into the remaining two stitches.

Thread the yarn onto a tapestry needle and insert the tapestry needle into the centre of the i-cord. Pull the yarn through to hide it inside the i-cord. Trim off the yarn end. Do the same to the other end of the i-cord so that both ends are neat.

Thread up the sewing needle and knot the end. Starting at the cast on end of the i-cord, (not the side that has been decreased), coil the I-cord and stitch it in place with the sewing thread. This is best demonstrated in the tutorial video above.

knitting a potholder

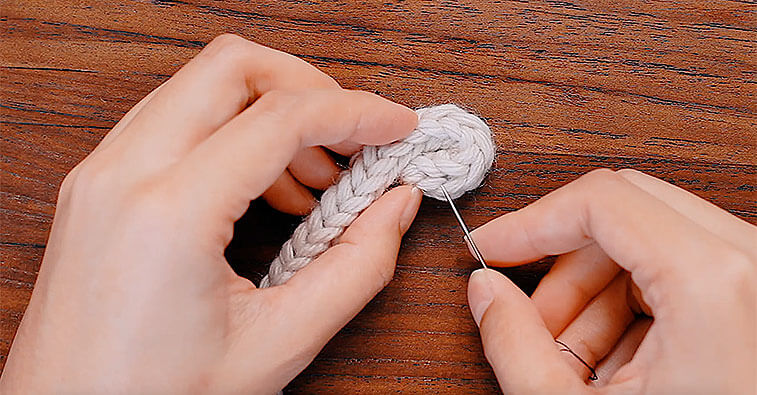
Continue coiling and stitching until the i-cord is all coiled up. Stitch into the tapered end of the i-cord a few times to secure it in place.

Cut a small leather piece that’s roughly 1”x3” or a length that can wrap two widths of the outer i-cord.

knit potholder tutorial

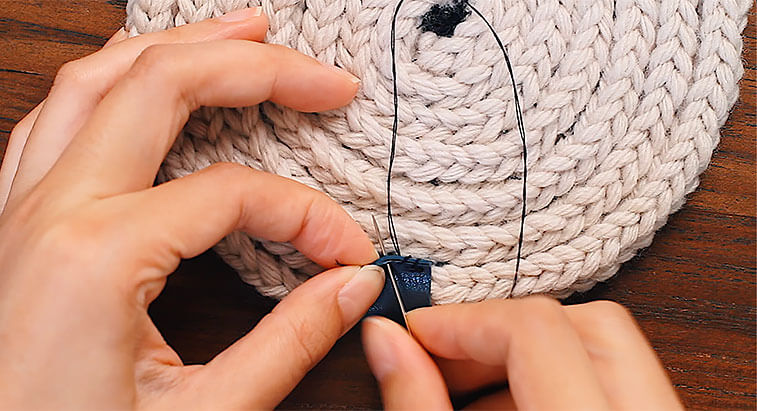
Cut through the stitching so that the leather piece can wrap around two width of the i-cord. Insert the leather piece around the i-cord and stitch it in place. I’ve used whip stitch because I think it complements the rustic look of the potholder.

Now the potholder is complete!

potholder tutorial

Pin
Share
Tweet
Pin
Share
Tweet

Categories: Gifts, Homeware / Difficulty: Beginner /

Reader Interactions

You May Also Like

rib hat knitting patternHow to Knit a Classic Beanie (Free Pattern and Video)How to Knit a Slouchy Hat PatternThe Everyday Raglan Pattern

Leave a Comment Cancel reply

Your email address will not be published. Required fields are marked *

Primary Sidebar

Most Popular

  • 3 beginner knitting mistakes 3 Beginner Knitting Mistakes and How to Fix Them
  • how to knit a scarf for beginners How to Knit a Scarf for Beginners
  • egyptian knitting The History of Knitting Pt 1: Mysterious Origins

Categories

Footer

Navigate

  • About
  • How To Knit
  • Patterns
  • Blog

Support

  • Privacy and Affiliate Disclosure
  • Technical Support
  • FAQ
  • Contact
  • Advertise

Instagram

Follow Us On Instagram

Pom pom pens make great last-minute gifts! If you’ve got scrap yarn and a glue gun, you can make these pens! They turn writing into a fun and playfulness exercise ✨ I’m gifting these pens to my nieces this holiday season. I think they’ll love it!  For more last-minute knit and yarn-related gift ideas check out the link in my profile!  #lastminutegifts #furrypen #diyfurrypen #diyfuzzypen #pompom #pompoms #knitgifts #knittedgifts #giftsfortweens #giftsforteens #knitting #yarn #yarnlove #yarnlovers #knitgift #giftideas #giftidea
This double stockinette stitch headband is super c This double stockinette stitch headband is super cosy and easy to knit!  🤓 Instructions:  Cast on an even number of stitches. (I cast on 36 sts for mine. Cast on more or less depending on the yarn you use and the width you’d like).  Row 1: *k1, slip 1 with yarn in front, then bring yarn to the back; repeat from * to end of row  Repeat Row 1 until headband fits around your head snugly.  Cast off in pattern  Seam together as shown in the video.  Weave in ends and wear with confidence!  To watch the full pattern tutorial, head to my YouTube channel and search for “Twisted Headbands” or go to this link: https://bit.ly/3DLiMWc  Yarn: @malabrigoyarn silky merino in color Mares 196
Needles: 4mm needles
Supplies from @lovecraftscom 
#knittingpattern #knitting #knitstagram #knittersgonnaknit #knitknitknit #freeknittingpattern #beginnerknitter
Let’s make a bobble! 🫧 In this demo I’m m Let’s make a bobble! 🫧  In this demo I’m making a 5-stitch bobble. But you can make a bobble of any size! Just knit into the stitch more or less times to make the bobble bigger or smaller.  🤓 Instructions:  Knit into front and back, front and back, and front of the stitch. 5 sts made.  Turn work to wrong side. Purl the 5 sts.  Turn work to right side. Sl2 sts knitwise, K1, pass 2 slipped sts over first stitch. Sl1 knitwise, K1, pass last 2 sts over remaining stitch. 1 stitch remains  To watch a detailed bobble demo, watch the baby bobble blanket tutorial in the link in the description. Happy knitting!  #bobble #bobbleknitting #knittersgonnaknit #knittinginspiration #knittingtutorial #bobblestitch #bobbles #showtimeknit #knittersofinstagram
The Baby Bobble Blanket is as fun to knit as it is The Baby Bobble Blanket is as fun to knit as it is to snuggle into ☺️  Sized for babies, but easily customisable for kids and adults 👶 👧 👵  Grab the free pattern in the profile link or at sheepandstitch.com  #knittingpattern #knittersgonnaknit #babyknits #babyknitting #babyknit #babyblanket #knittingtherapy #knitstagram
⭐️ New Pattern ⭐️ The Baby Bobble Blanket ⭐️ New Pattern ⭐️ The Baby Bobble Blanket is a beginner-friendly pattern for the tiny tot in your life!  Studded with big bobbles, it’s a delight to hold, snuggle and fall asleep with 😴  This pattern is sized for babies, but easily customisable for kids and adults. Grab the #freepattern and video tutorial in the profile link or at sheepandstitch.com  Yarn: 8 balls of Debbie Bliss Cashmerino Aran in Baby Pink from @lovecraftscom  #knitting #knittingpattern #knitstagram #babyblanket #babyknits #fallknits #knittersgonnaknit #knitknitknit #knitaddict #knittersofinstagram #knitting_inspiration #handknit #handknits #babyknitting #babyknittingpatterns #bobblestitch #knitblanket
The Market Bag is so cute, practical and eco-frien The Market Bag is so cute, practical and eco-friendly 🍃 It’s a unique knit that’s perfect for all your grocery-toting needs!  I loved knitting this lacy dude. It’s so fun and satisfying, and it comes together very quickly because of the expansive lace 🕸  Grab the #freepattern and video tutorial in the link in the profile!  #knitting #marketbag #knitbag #knit #knittersgonnaknit #knitstagram #knitting #knitting_inspiration #knittinginspiration #knittingpattern #knittingpatterns

Search The Site

Stay in Touch

  • Facebook
  • YouTube
  • Instagram
  • Pinterest

2023 Copyright © Sheep and Stitch Limited

Pin
Share
Tweet