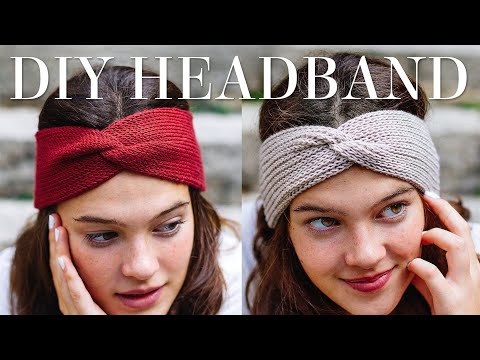
How to Knit a Twisted Headband (Step-by-Step Pattern)
May contain affiliate links (what's this?)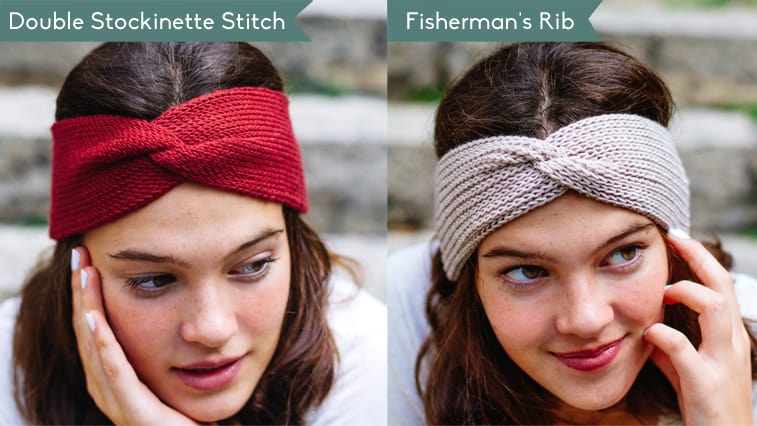
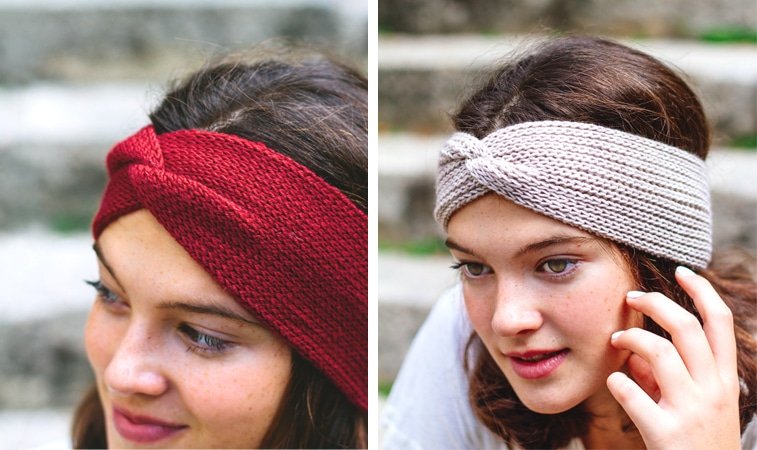
This headband knitting pattern covers two different headband styles with a simple and stylish twist.
The first headband style is knit in Double Stockinette Stitch, which yields a double-layer of stockinette stitch.
The resulting fabric is extra warm, and unlike regular stockinette stitch, it doesn’t curl!
The second headband style is a classic Fisherman’s Rib. This stitch is super stretchy and looks wonderful knit into a headband.
This tutorial video teaches you how to knit these two headbands from beginning to end. It includes tips like how to insert a lifeline (very essential!) and how to size the headband for a perfect fit.
These headbands are great last-minute gifts, so knit them up for the holidays!
Buy the PDF Headband Pattern
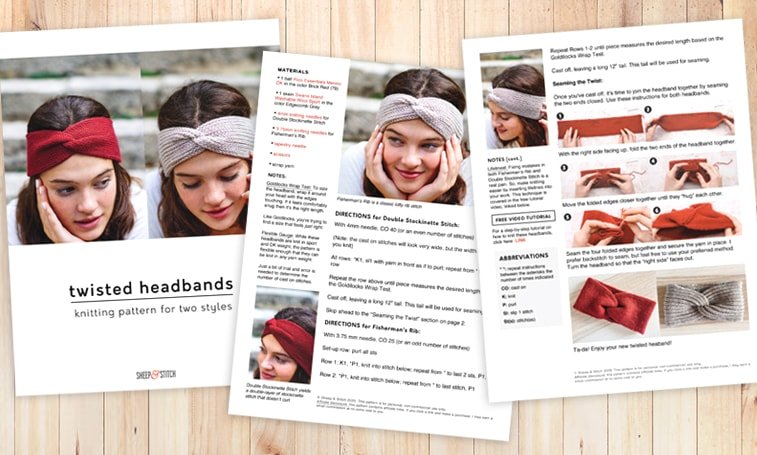

For the price of a coffee, you can support Sheep & Stitch by purchasing a PDF file of this pattern. This PDF file is beautifully laid out and ready to be printed and marked up by you!
Click the button above to purchase or visit the shop. Upon purchase, the pattern PDF file will be delivered to you by email. Thank you for your support!
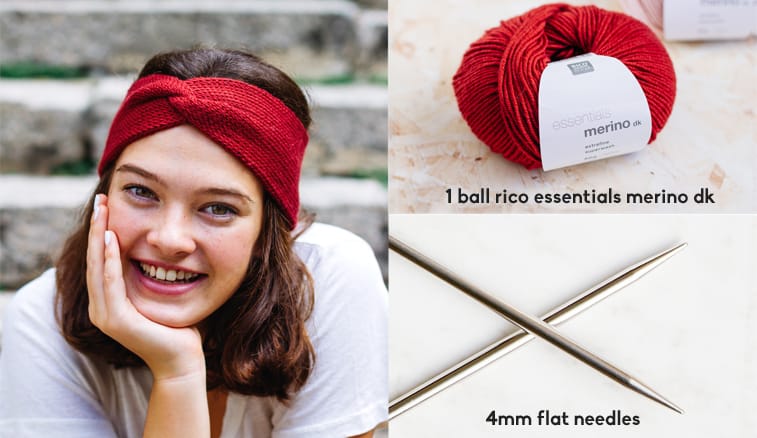
Twisted Headband Materials & Notes
Yarn Used For Double Stockinette Stitch: one ball of Rico Essentials Merino DK in the color Brick Red (79)
Yarn Used For Fisherman’s Stitch: one skein of Swans Island Washable Wool Sport in the color Edgecomb Grey
The Swan’s Island yarn used for the Fisherman’s Rib Headband is unfortunately hard to find these days, so I’ve included similar substitutes below.
Other Similar Yarns:
- Lang Lang Yarns Merino 120 (100% merino with dozens of colors)
- Paintbox Yarns Simply DK (100% acrylic affordable yarn with lots of colors)
- Berroco Quechua (luxurious merino-alpaca-yak blend with a beautiful sheen)
- Fyberspates Vivacious DK (color Dovestone similar to Swans Island Grey)
- Madelinetosh Sport (color Kitten similar to Swans Island Grey)
Recommended Needles: 1 pair of 4.00mm needles for Double Stockinette Stitch Headband and 1 pair of 3.75mm needles for Fisherman’s Rib Headband.
Notions:
- tapestry needle (LoveKnitting) (Amazon)
- scissors (LoveKnitting) (Amazon)
- scrap yarn
Pattern Notes
Goldilocks Wrap Test: The easiest way to know when to cast off and start seaming is to wrap the headband around your head with the edges touching. If it feels comfortably snug then you’re ready to cast off.
Too tight? Then knit a bit more and try again. Too loose? Unravel to a point where the fit is comfortable. I call this the Goldilocks Wrap Test because like Goldilocks, you’re trying to find a size that feels just right.
Flexible Gauge: While I’ve designed these headbands for sport and DK weight, these headbands can be knit in any yarn weight. You’ll just need a bit of trial and error to figure out the number of cast on stitches. Then, knit as outlined in the instructions below and use the Goldilocks Wrap Test (see above) to determine when to cast off. Seam the twist as shown in the video, et voila, you’re done!
Construction: These headbands are knit flat and then seamed together to form the twist in the middle.
Lifelines: Fixing mistakes in both Fisherman’s rib and double stockinette stitch is a real pain. So, make knitting easier by inserting lifelines into your work. This technique is covered in the tutorial video.
Twisted Headband Video Tutorial
This tutorial video walks you through how to knit these headbands from beginning to end.
Double Stockinette Stitch Headband Instructions
With 4mm needle, CO 40 (or an even number of stitches)
(Note: the cast on stitches will look very wide, but the width will shrink as you knit)
All rows: *K1, sl1 with yarn in front as if to purl; repeat from * to end of row
Repeat the row above until piece measures the desired length based on the Goldilocks Wrap Test.
Cast off, leaving a long 12″ tail. This tail will be used for seaming. Skip down to “Seaming the Twist” for instructions on how to seam the headband together.

Fisherman’s Rib Stitch Headband Instructions
With 3.75 mm needle, CO 25 (or an odd number of stitches)
Set-up row: purl all sts
Row 1: K1, *P1, knit into stitch below; repeat from * to last 2 sts, P1, K1
Row 2: *P1, knit into stitch below; repeat from * to last stitch, P1
Repeat Rows 1-2 until piece measures the desired length based on the Goldilocks Wrap Test.
Cast off, leaving a long 12″ tail. This tail will be used for seaming.
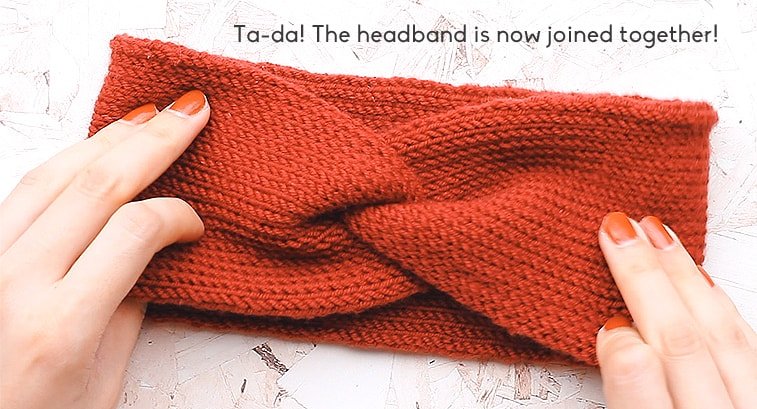
Seaming the Twist
Once you’ve cast off, it’s time to join the headband together by seaming the two ends closed. By twisting the two ends into each other, we create the twist. Let’s start seaming!
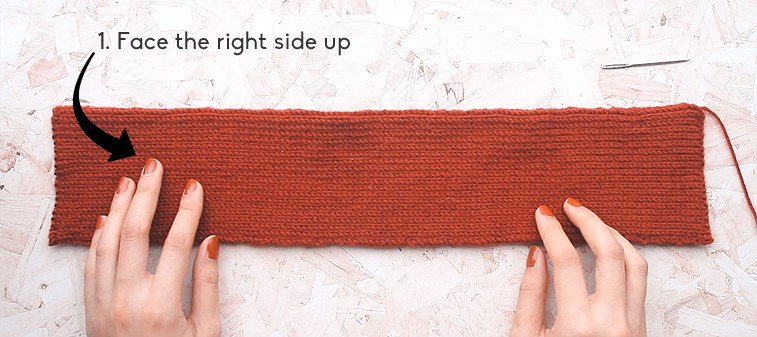
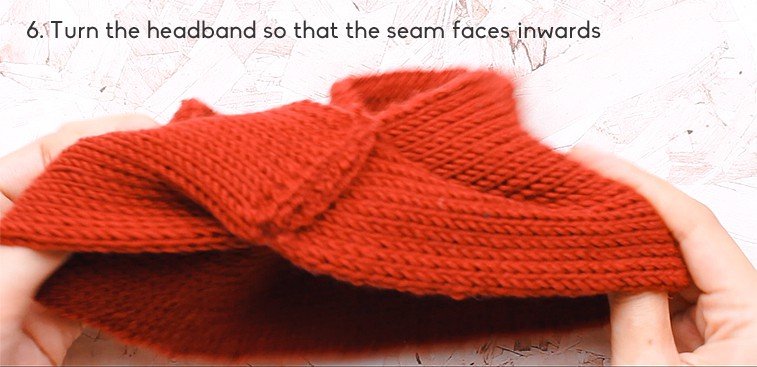
Which side of the headband will be the “right side”? This side faces out to the world while the “wrong side” faces your forehead. Once you decide on the “right side,” lay it facing up.
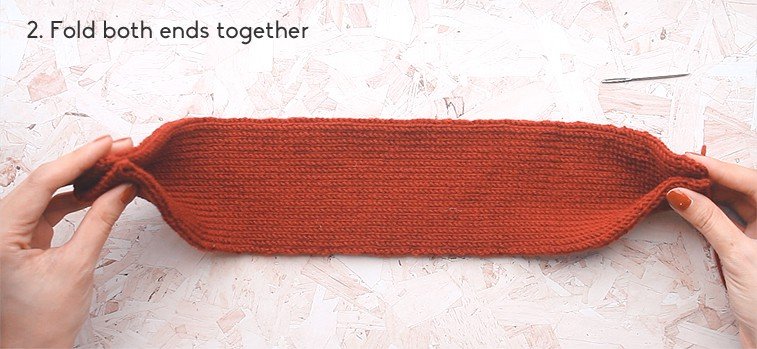
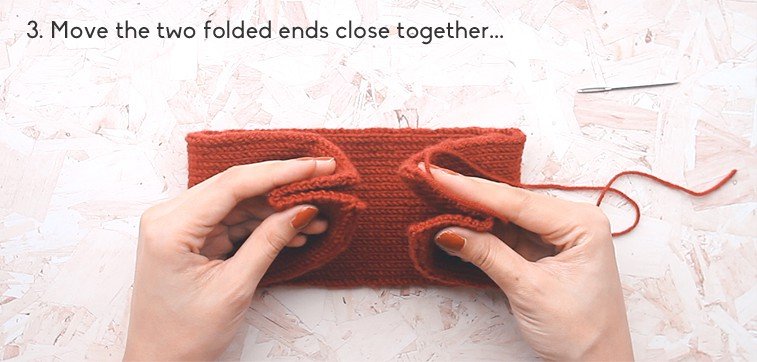
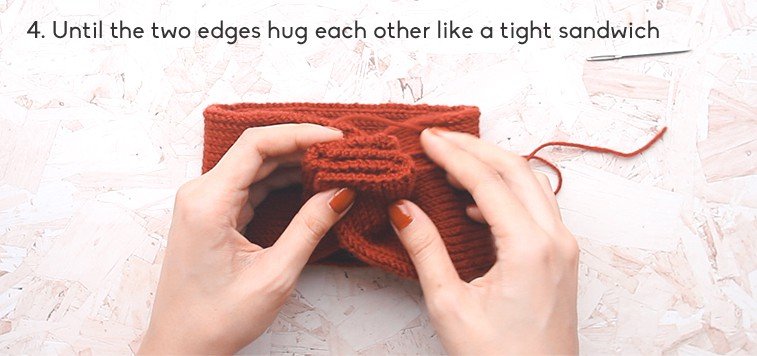
Make sure that all four edges of the hug are flush against each other at the sides and on top.
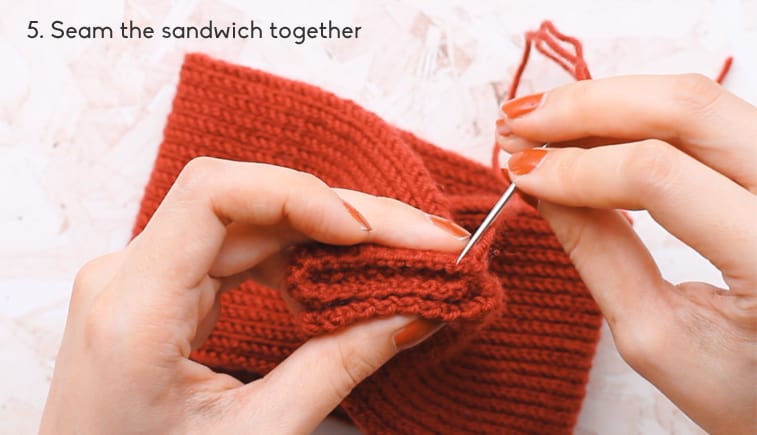
Thread the tail end of the yarn with a tapestry needle and seam the four hugging edges together. Backstitch is my preferred seaming method because it’s very secure. However, feel free to use your preferred seaming method.
Abbreviations
* *: repeat instructions between asterisks the number of times indicated
CO: cast on
K: knit
P: purl
Sl: slip 1 stitch
St(s): stitch(es)
Support Sheep & Stitch!
While the pattern instructions and video tutorial are free and available above, for the price of a fancy coffee, you can support Sheep & Stitch by purchasing a PDF file of this pattern. This PDF file is beautifully laid out and ready to be printed and marked up by you!
Upon purchase, the pattern PDF file will be delivered to you by email. Thank you for your support!
How wide did your headbands turn out, Davina?
I’m currently making the double stockinette stitch headband. I’m almost on the seaming part. I really like the way that it’s coming out so far.
Happy to hear it!
When I try to purchase the $4.00 pattern it comes up as $4.99. Makes me wonder if all is legit. Why is the price different?
Hi Donna, sorry about the confusion. The price has increased since the pattern was first published. I just changed the buy button’s pricing as I understand it can be confusing to have the button say $4.00 when the actual price is $4.99. Again, I apologise for the confusion.