
How to Knit a Chunky Hat for Beginners
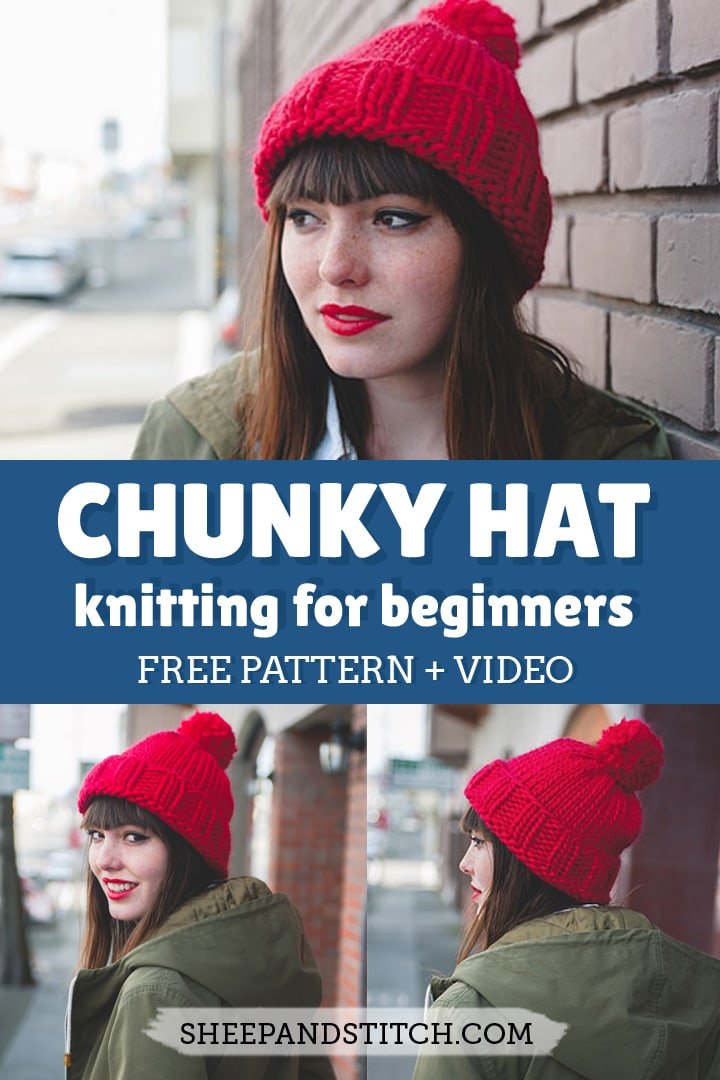
May contain affiliate links (what's this?)This chunky hat knitting pattern is perfect for beginners! This free hat pattern produces a warm, cushy fabric that knits up quick. It’s also a great hat pattern for ambitious beginners looking to expand their skills beyond the basics.
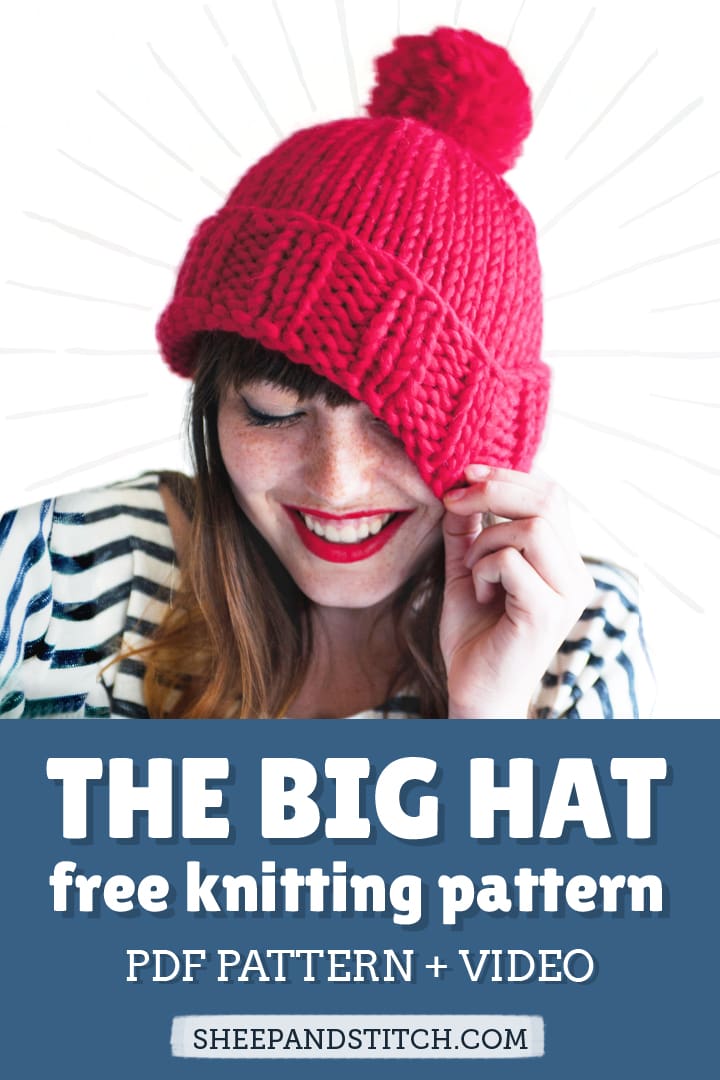
With its oversized pom and reverse stockinette stitch peeking out from the brim, this hat manages to be both playful and practical. Made with super bulky yarn, it knits up very quickly!
In this post, you’ll find the free hat pattern and two video tutorials that walk you through the entire hat knitting process.
If you’d like to purchase a PDF file of the pattern, head to the pattern shop or click on the button below. Thank you for your support!


Materials & Notes
Yarn:
- 1 skein Cascade Yarn Magnum in color Ruby
- 1 skein Malabrigo Rasta (colourful and hand-painted)
Recommended Needles:
- 16″ US 15/10mm circular needle
- US 15/10mm double pointed needles (use a needle size that gives you the gauge listed below – every knitter’s gauge is unique!)
Notions:
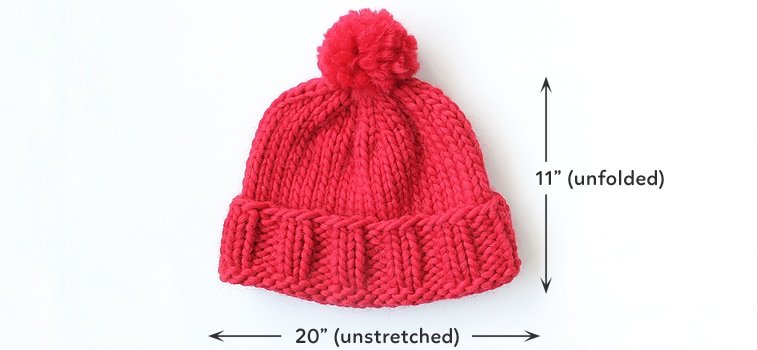
Finished Measurements: circumference is 20” (un-stretched)
Gauge: 9 sts = 4″(10cm) in stockinette stitch
Notes:
2×2 Rib:
Round 1: [K2, P2] to end of round
Repeat this round for as long as you’d like 2×2 rib
Chunky Hat Knitting Instructions:
Using the long-tail method, CO 44 sts on circular needles and join in the round, making sure not to twist stitches. Place a marker to mark the beginning of the round.
Knit in 2×2 rib until piece measures 2.5″ from cast on edge.
Knit in stockinette stitch for 6.5″
Piece should measure 9″ from the cast on edge (2.5″ of rib + 6.5″ of stockinette = 9″).
Move on to the decrease round. (When decreasing, switch to DPNs when stitches become too sparse to knit with circular needles.)
Decrease Rounds:
Rnd 1: *K2, K2tog* to end (33 sts)
Rnd 2: Knit 1 row even
Rnd 3: *K1, K2tog* to end (22 sts)
Rnd 4: Knit 1 row even
Rnd 5: *K2tog* to end (11 sts)
Rnd 6: *K2tog* to end, then K1 (6 sts)
Cut yarn and weave through remaining 6 sts. Bring yarn to the inside of the hat, make a knot to secure and weave in ends.
Pom Pom:
Make a pom pom 3.5 – 3.75″ in diameter and sew to the crown of your hat. Weave in ends.
Not sure how to make a pom pom? Check out this step-by-step tutorial on making the perfect pom pom.
Abbreviations:
* *: repeat sequence between * * as many times as noted
CO: cast on
DPN(s): double pointed needles
K2tog: knit two stitches together
K: knit
P: purl
Sts: stitch(es)
Did You Make a Big Hat? Share your project on Ravelry (aka. Facebook for knitters), add your project for the Big Hat and see over 150 other Big Hats made by knitters around the world!
Help Support Sheep & Stitch!
While the pattern instructions and video tutorial are free and available above, for the price of a fancy coffee, you can support Sheep & Stitch by purchasing a PDF file of this pattern.
This 3-page PDF file is beautifully laid out and ready to be printed and marked up by you!
Upon purchase, the pattern PDF file will be delivered to you by email. Thank you for your support!
Hi there,
I love you tutorial video. Simple and easy to follow and understand for beginner like me. I have finished the cushy cowl scarf so now I want to try knit the beanie. I was wondering, Can I use the same size needle and the length of the wire that I used to knit in cushy cowl to knit this beanie? Because I couldn’t start to knit the yarn together as I found the length of the wire is too long or do I have to increase the number stitches?
Thank you very much for you help.
Alicha
Hi there! It’s not advisable to re-use the circulars from the cushy cowl to knit the Big Hat. Reason being that the circular needle should be *smaller* than the circumference of the hat, which is why a 16″ needle is recommended. Your best bet is to get a pair of circulars in the recommended size and length OR get a pair of DPNs in the recommended size. You can use DPNs for the whole hat instead of using circulars and then switching to DPNs. It’s more economical, although maybe not as easy!
Hi Davina!
I just finished my first Big Hat! I followed along with your video and it was great! I really enjoyed knitting it and I’ve started another. Your teaching videos are my favourites! Do you think you’ll be coming out with more?
Your hat is beautiful…it looks just like the pattern.
HI,
I tried to download the pattern, I saved it, and i even tried to change browser settings and the words are either not showing up or are jumbled up. Is there a way that you can maybe email me a PDF file?
Hi Danielle,
If you are unable to view the pattern in the browser, try saving the PDF file to your hard drive first and then opening the PDF in a PDF reader like Adobe Reader, which is free, or an app like Preview on a Mac.
Browsers will sometimes render PDFs in a wonky fashion, especially if the browser is not updated to the latest version. In any case, try the above method first. If that doesn’t work, email me at davina@sheepandstitch.com and I’ll send the PDF or a JPG of the pattern.
Thanks!
Hi! I read an earlier comment by someone asking if they could use a much longer circular needle and you said it would be difficult since the needle should be shorter than the length of the knitting.. I am having lots of trouble finding a 16″ needle, would a 24″ be alright? Also, what would you say the maximum head circumference is that the hat (as written in the pattern) would fit? I know the unstretched circumference when complete is meant to be 20″. Would it be quite simple to just add some stitches to make it bigger? My boyfriend has quite a giant head, by my sneaky estimate approximately 28 inches… I did read your comment about simply scaling up needle and yarn size, however the yarn I’m wanting to use is already bigger (meant to be knitted up on 12mm needles, which I think is a US 17) and I’m a fairly tight knitter, so the gauge (based on a scarf I’m knitting at the moment) is actually exactly the same as the one listed in your pattern for the 10mm needles and thinner yarn… Thank you very much for uploading this pattern and such detailed instructions! Went through probably hundreds of hat patterns before finding one I liked this much 🙂 never knitted a hat before but you’ve inspired me to give it a try!
Hey Samantha!
Okay, so needles first: I think you’ll have a hard time knitting this hat in the round with 24″ needles. You’ll be stretching your project like a mad woman trying to get those stitches to stretch across 24″ when the circumference is probably around 20″ give or take an inch or two depending on whether you decide to customise your hat. So, if you plan on knitting in the round, I would strongly suggest you use 16″ needles. Amazon usually has a nice selection of needles.
Alternatively, you can knit back and forth on flat needles and then seam your hat once you’re finished. There’s a premium pattern called the Big and Little Hats in the shop that has a tutorial on how to knit the hats on flat needles, although sizing really only goes up to an adult woman’s head: https://sheepandstitch.com/shop/the-big-little-hat-pattern/
As for your boyfriend’s giant head, I *really* can’t imagine it being 28″! I mean that’s the waist circumference of one of my friends! The average male head circumference is 23″ according to the Craft Yarn Council: https://www.craftyarncouncil.com/headsize.html
With hats you need what’s called “negative ease,” which means that the hat circumference is always smaller than the actual head circumference of the wearer. This allows the hat to stretch and stay nice and snug on your head. So, let’s say your boyfriend is larger than average and has a 24″ head. In this case, the finished circumference of the hat should really be about 22″ or so.
As for the maximum sized head that the hat can fit assuming that you get gauge? Well, that depends! It depends on how “stretchy” your yarn is. Generally, a one ply yarn is not so stretchy. A two or three ply gives a bit more stretch. Wool is very stretchy. 100% alpaca or silk is not so stretchy.
One thing you can do to stretch out your hat is to block it. This means that you can wet your hat after it’s complete and stretch it to the size that you like. Then, you can pin it down to those dimensions or stuff a towel into it like a makeshift head and let it dry. The hat will dry to those dimensions. That’s one way you can stretch out a hat.
But beware: if you stretch it out like crazy, the stitches won’t look very nice and you’ll lose the elasticity of the stitches. You can use this method if you need to push and pull by an inch or so, but any more and you risk the hat looking kind of holey and thin.
Anyway, I hope that helps! I know what it’s like to spend hours (or days and days!) looking through Ravelry for that perfect pattern, so I’m super flattered that you’ve landed on the Big Hat!
Thank you for your very detailed response!! I think I was measuring his head at an angle, as in sloping down at the back – so measured straight around it’s probably about 24-25. I’ll try to get some 16″ needles and maybe try to scale the hat up just a little bit, to about 22″ like you said. I’m planning to use this yarn (https://www.lanagrossa-store.com/lana-grossa-yarns/wool-lana-grossa-lei-uni-neon-ragazza-id_1927.html) which is 100% wool, so hopefully that gives me a bit more leeway! Thanks again!
Haha! Glad to hear it! 24-25″ sounds more likely!
Hello,
I seem to be having trouble finding needles in this size, I have been to every craft shop in the area (UK) and have been turned away. No-one seems to think they exist!
Do you have a link as to were I can purchase the needles, maybe I am looking at this wrong as I am pretty new to knitting.
I love this pattern and really want to try it!
Thankyou 🙂
Hey! These needles definitely exist! I found a pair on a website here: https://www.createforless.com/Clover-Bamboo-Circular-Knitting-Needles-16-in.-Size-15-10-mm/pid70060.aspx But, I’ve never shopped here, but it’s worth checking out. Also, another pair here: https://www.thenestyarn.com/products/addi-turbo-circular-needles-10mm-15-16/ These are a bit pricey because the brand, Addi Turbos, are the best knitting needles out there. For what it’s worth, I purchased my pair at a yarn shop in San Francisco called Imagiknit (https://imagiknit.com/) You can check to see if they have any in stock.
Hope that helps!
Oh! While I was answering Chantel’s question below, I found that Vegan Yarn sells 16″ circulars that are 10mm. Check them out here: https://www.veganyarn.com/product/clover-takumi-bamboo-circular-needles-40cm-16
I love this hat but…I’m a vegan, and a beginner at knitting. I am always looking for alternatives to wool yarn. Could you kindly recommend a comparable yarn to the Cascade yarn Magnum that is not made from animals?
It just so happened that someone recommended Vegan Yarn to me this week! https://www.veganyarn.com They do have a super bulky weight yarn that looks absolutely gorgeous: https://www.veganyarn.com/category/yarn-vega-super-bulky
Thanks for the mention Davina! Love the hat!
You’re very welcome! Love sharing beautiful hand dyed yarns!
Hi
I’ve been looking at the sample yarn, ‘Malabrigo Rasta’ that you used for this hat.
It says, ‘To ensure random color distribution, work from two balls of yarn at once, alternating a few rows from each ball’.
Did you do this? And if so, how would you do this? Sorry if this is a silly question.
Thanks
Hey Leigh, I don’t think I did this for this cushy cowl. However, with hand-dyed yarns like Malabrigo’s, sometimes skeins from the same colorway will vary a little bit. That’s the unique nature of hand dyed yarns.
So, if you knit with one skein and then join a new skein, sometimes you’ll notice a difference in color between the two skeins. This is most noticeable when knitting in stockinette stitch because it’s such a flat, even fabric – color irregularities have nowhere to hide! With garter stitch, it’s not *as* noticeable.
The way around this, is to blend the two skeins together so that any color differences are mixed up in the fabric. If knitting in the round, which is what we do with the cowl, you can knit one round with Skein A, and then join Skein B and knit one round with it. Then pick up the strand of yarn from Skein A and knit one round; then drop Skein A and pick up Skein B and knit one round. Then repeat, alternating Skein A and Skein B each round.
You don’t *have* to do this. If you notice that your two skeins are looking very different in color (even though they’re the same colorway), it’s a good idea to use this method. If you don’t notice much difference and you’re not a stickler for totally even color, then you can just knit with one skein until it’s all used up, then move on to your second skein. Hope this helps!
ETA: I just realised that you posted this under the Big Hat. The Big Hat only uses one skein of Rasta, so in this case, you wouldn’t need to do this at all. The above directions are only for projects that require more than one skein of yarn!
Hi! I’ve nearly finished knitting my cushy cowl and I’m about to buy the materials to make a matching hat! The only thing is I’m having trouble finding 10mm diameter circular needles in the correct length. I already own some 10mm ones that are 24 inches long… would they be suitable or would that cause issues? Also, is 8 inches long enough for the DPN?
Thanks for your lovely tutorials!
Awesome!! Looks like you’ve caught the knitting bug!
For the hat, you’ll really need 16″ needles. The basic principle is that your circular needles need to be smaller than the finished circumference of your hat. If you try to use the 24″ needles, you’ll have a hard time stretching your hat stitches to meet together in order to join in the round. Think about it this way: the finished hat circumference is about 20″ if I remember correctly. If your use 24″ circular needles, you’ll need to stretch your hat stitches across at least 4 extra inches in order for it to join in the round. So I wouldn’t recommend using 24″ to knit a hat. It’s cumbersome and I pretty much guarantee you’ll have a bad time!
For supplies, Vegan Yarn sells 10mm 16″ circulars here: https://www.veganyarn.com/product/clover-takumi-bamboo-circular-needles-40cm-16
8″ DPNs sound perfectly good!
Thanks for your help! It seems so hard to get them in the UK, I managed to find some but it had to be from a set of interchangeable needles!
Oh! Glad that you got your needles. Interchangeable needles are pretty great too! If you got a few other needle sizes and a 16″ cable then you’ve got a nice set for hat knitting!
I. Freaking. LOVE you. Because of you, I knitted a hat. I knitted a hat because of you. YOU. The you who is indeed my hero. <3 I'm literally sitting here wearing my dapper blue tweed hat, and writing a note to you, because I am so flipping happy. What is it about conquering that next knitting challenge that's literally so awesome that it makes you feel like you're on a rocket ship to the moon? I don't know, but being able to sit outside on a sunny autumn day, and knit my first hat just made me so happy. And I have you to thank, so again, THANK YOU! 🙂
Hey Marci! You’re awesome! Thank you for you comment! I totally know the feeling of conquering a knitting project and feeling OVER THE MOON or that moment when a concept just clicks – love that! So, major kudos to you for knitting a hat!
If you want to share your awesome blue tweed hat, please do so here in the comments or on the Sheep & Stitch FB page so that other would-be knitters can see that knitting is not hard or scary at all! https://www.facebook.com/sheepandstitch
Stay awesome, stay warm this winter and happy knitting!
I have some cascade magnum yarn and can’t wait to start this. I would like it to be more slouchy. What would you do to accomplish this? Thanks!
Hey Cathy! For instant slouch, you can do two things:
1. knit the Big Hat as is, but don’t fold up the brim. Wear the hat with the brim rolled down, like the photo below. However, if you choose this method, it’s a good idea to use smaller needles (go down 1mm or so) so that the brim stitches are tighter. This makes the hat more snug against your head.
2. The other option is to knit the body section (the plain stockinette stitch knitting) an inch or two more before you work the decreases. This lengthens the body and gives the hat some slouch. By doing this, you can keep the brim folded, which keeps it snug against your forehead, and have the slouch.
Hope that helps!
Finished my big hat to match my cushy cowl! Your tutorials have been fantastic 🙂
Lauren, this hat looks lovely! And that color is gorgeous! Hope you stay warm and toasty with this set this winter!
I LOVE LOVE LOVE this tutorial, super easy. Earlier in the year I jokingly told my boyfriend I was going to knit him a hat for Christmas. As winter loomed I realised I should get started, and as a complete novice I assumed it would take weeks to complete. Then I found this tutorial. I ordered everything online and followed every step painstakingly and got to the end and literally could not believe I’d actually made a hat and in only a few hours! Pretty much everyone I know is now getting one for Christmas in different colours. I love mine! Thank you so much for these tutorial videos. x
Wow! Your hat looks so awesome! I hope your boyfriend and all your friends and family love their handknit hats! With Christmas looming so close, I think I’ll be knitting a couple hats as last minute gifts too. The only thing left to decide is what tv/movie marathon to watch while knitting!
Hi,
I’m sorry to bother you but I wanted to know if it was possible to knit this hat with circular 31 inches needles or if you could only do it with 16″ ones. It’s my first time knitting a hat so I’m worried I’ll be making a giant hat instead, but I’ve followed your instructions when making scarves and they looked really great! Thanks in advance for your answer and thank you for sharing all these tips, they’re super useful! x
Hey Solly! It’s possible to knit the hat on 31″ needles BUT you would need to use a different knitting method called “magic loop.” I don’t cover this method in the video tutorial, but you can find other tutorials on YouTube that show you how to knit in the round using magic loop. This tutorial only covers knitting with 16″ circular needles. Sorry about that!
Thank you so much for your reply, I somehow managed to make it work and it looks great. Thanks again for your answer!
Awesome!! As they say, where there’s a will, there’s a way!
Hi Davina,
I was so excited to start working on my big hat. I got the yarn, the double pointed needles, and I have my circular set. But I cast on 44 stitches and I realized that from needle to needle with my cord was to long. The cord said it would be 16″ but with my needles attached it was way to long. Please help, I’ve so been looking forward to making the big hat. Your website and videos have been such a great resource, the detailed yet easy to understand directions are the best. I made the cushy cowl and I love it! I’ve now made several in all different sizes and I’m making a couple more for friends.
Hey AmyL! So, the circular needles you got aren’t 16″? When you measure them from tip to tip, what’s the measurement? It sounds like you have a pair of interchangeable needles, is that correct?
If the needles are 24″ or a longer needle, you can use a method called “Magic loop” to knit the hat. I don’t cover this method in the video, but there are a number of videos on YouTube that go through how to knit using magic loop. You can use this method and still knit the hat by following along with the video. Hope that helps!
Hi, yes I have a interchangeable set of circular needles and the shortest cord I have is 14″ or 16″. I’ve heard of the magic loop so I’ll give that a try. Thanks
Hi Davina! Just finished my Big Hat! First time! Used Malabrigo Rasta in two colors. I’m giving this one as a gift, but I’m making a bigger one for me. (Big heads run in my family!). Thanks for your great video and instructions! Fantastic.
Your hat looks absolutely wonderful! Super neat and round pom pom too! Well done and stay warm!
Hi Davina,
I love your tutorials and finished my first big hat! The only issue I have is that my pom pom won’t stay tightly attached and it actually came out. The hole at the top seems to have loosened. Any tips on how to keep it tight? Also, what do I do with the cast on tail? Do I just weave it in?
Thanks!
Kelli
Hey Kelli!
Congrats on finishing your Big Hat! Okay, so first thing’s first: the baggy top of the hat. I would try to “un-weave” in that tail end from the top of the hat and then tighten it. Try pulling the tail end nice and tight and then tying a knot. You can even weave in that tail end into a stitch near the top of the hat and then tie your knot so that the knot is anchored onto the top of the hat if that makes sense. All this is happening on the inside (or the “wrong side”) of the hat.
As for the pom pom, I would take it off from the hat. (Hopefully you’ve left a decent length of yarn attached to the pom!) After tightening the top of the hat, pull your pom pom into the hat and then use the pom’s yarn end to tie another knot into one of the stitches at the top of the hat. If you have two yarn ends attached to the pom, you can weave each yarn end into a stitch at the top of the hat and then tie those two ends together. Then weave in that tail end. This weaving in and knotting is all happening on the inside of the hat!
As for the tail end on the brim – d’oh! I forgot to film that portion. Basically, you can weave in that tail end into the brim of the hat. However, if you plan on folding up the brim, then you would weave in that tail end on the “right side” of the hat so that it doesn’t show up when you wear it.
Hope that helps!
Hi, Davina,
I am using the second part video to finish a beanie (not the Big Hat beanie here). Is it possible to just use two needles to decrease and finish the hat?
Hi Xelca,
Hmm.. So it’s possible to use a method called Magic Loop, which essentially uses one long circular needle to knit a hat. But if you’re going to use double pointed needles, you’ll need at least four needles to do it. The other workaround is to knit the hat flat on two needles and then seam it up at the side. Otherwise, I’m not sure you can decrease the hat with just two needles.
Hi Davina! I just finished making the Big Hat and I love it! The only problem is that the cast on edge has stretched out an extra inch or two!! I want to make the waffle stitch hat for my mum but is there anything I can do to avoid the same thing happening to hers?
Thank you and I love your channel!
Hi Rhiannon!
Congrats on completing the Big Hat! About the edge, there’s not much you can do now about the stretching, but for future hats, you can consider using a smaller needle (like 0.5-1mm smaller) to cast on and knit the ribbing and then switch over to your larger needle to knit the body of the hat. Most hat patterns follow this practice, but for beginners who might not want to buy two sets of needles, I didn’t want to advise an extra smaller set just for the ribbing.
For the waffle stitch hat, I’ve intentionally made the number of stitches at the ribbing to be smaller to ensure a snug fit. Then once you get to the “body” of the hat, we increase the number of stitches to give a looser fit around the head. If you’re worried about the ribbing, you can always use a smaller set of needles to knit the ribbing and then switch to your larger ones for the body. As always, make sure you can get gauge with your yarn and needles.
Hope that helps!
I really can’t thank you enough for this pattern! I’ve wanted to learn to knit for such a long time and you explain everything so clearly!! Loved making this and your scarf and I’ve added a bow and tassels to it! Hooked on knitting for life!!
HI Divina,
I really want to make The Big Hat, but I live in the UAE and knitting supply stores are sparse and have very little. And amazon won’t ship here 🙁 Is there any way to order a “The Big Hat” kit with yarn and needles here?