How to Seam Purl Stitches
May contain affiliate links (what's this?)Seaming purl stitches comes in handy when you need to seam garter stitch or reverse stockinette stitch.
In this post, we’ll go through the anatomy of a purl stitch (so you understand why we seam purl stitches the way we do), and how to seam purl stitches together for a neat finish.
How to Seam Purl Stitches Video Tutorial

Before we begin seaming, let’s take a look at the anatomy of a purl stitch. (This will come in handy when we seam).
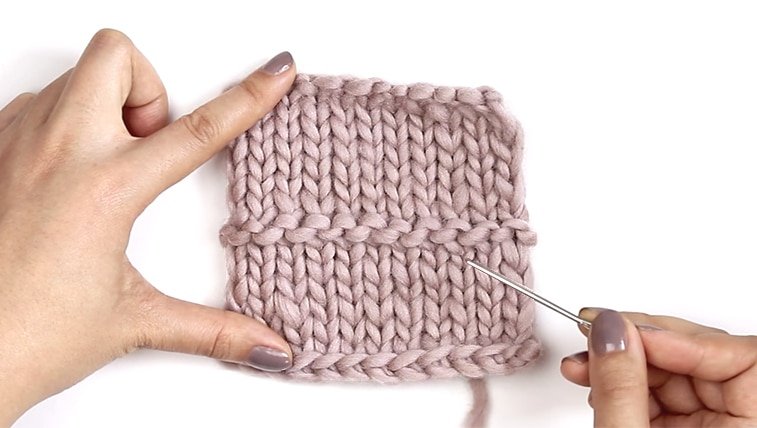
A purl stitch is made up of a top portion and a bottom portion. The top curves down like a rainbow. The bottom curls up like a smile.
In the photo above, try to identify the top “rainbow” portion and the bottom “smile” portion.
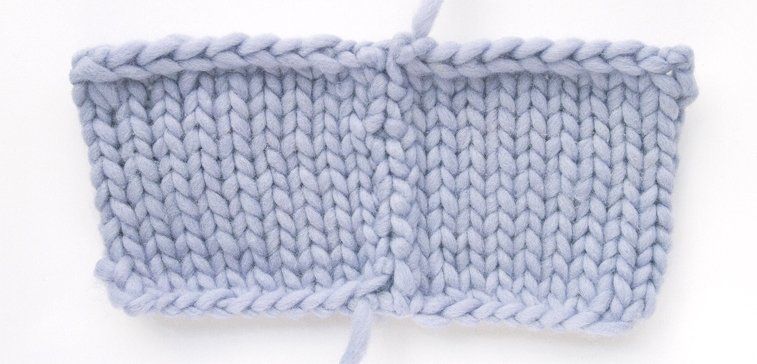
Here’s a better view of where the rainbows and smiles are located:
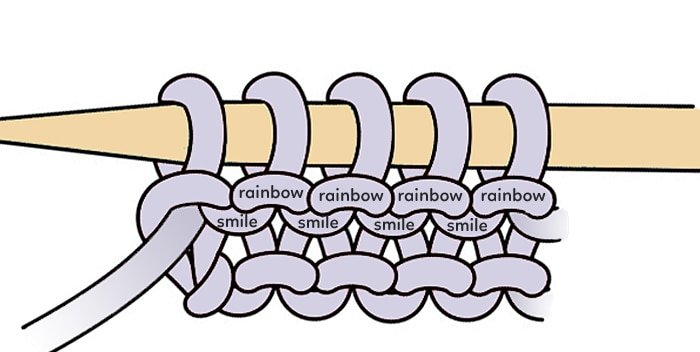
To seam purl stitches together, we’ll be seaming a smile from piece A to a rainbow from piece B. We’ll seam back and forth between rainbows and smiles.
Doing this creates the illusion of a purl stitch running across the two pieces.
So, let’s start seaming! First, cut a length of yarn that’s at least three times the length of the seam. Then, thread it up with a tapestry needle.

You’ll seam smiles on the left piece and seam rainbows on the right piece.
Starting at the bottom corner of the right piece, push the tapestry needle into a rainbow. Pull the yarn through, leaving a 6″ tail at the back.
Then, bring the tapestry needle to the left piece. Insert the tapestry needle into a smile across from the previous rainbow. Pull the yarn through, keeping a tension that matches the knitting.
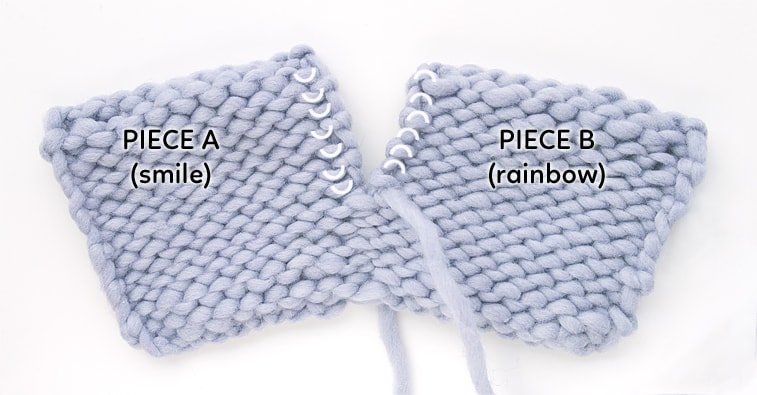
Bring the tapestry needle to the right piece and insert it into the rainbow above the first rainbow. Move over to the left piece and insert the tapestry needle into the smile above the last smile.
Continue in this manner, seaming into smiles on the left piece and rainbows on the right piece.
Depending on the gauge of the knitted pieces, you may decide to seam every other row instead of every row. In these photos, I’ve seamed every row, and I think the seam looks a bit bunched up as a result.
Try to keep the tension even as you seam. If you’re anything like me, you’ll pull the yarn too tightly. So, try to seam loosely, matching the tension from the knitting.
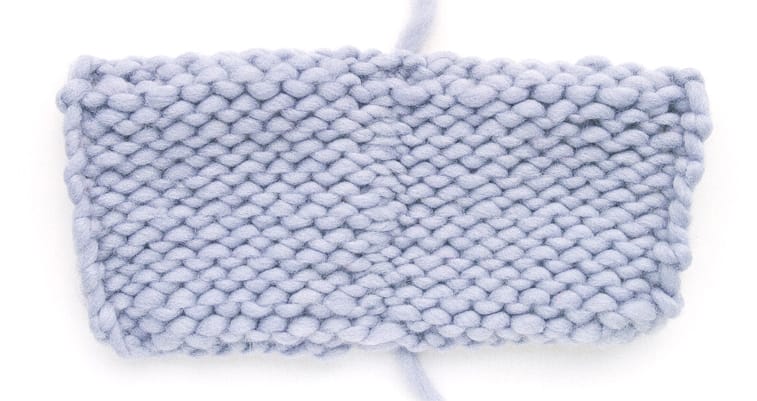
When you’ve completed the seam, it will resemble a vertical line of purls. If your seam looks a bit tight, pull the two pieces to loosen it up.
Doing a wet or steam block may also help loosen the seam if it’s looking tight.
The “wrong” side of the seam will look surprisingly even and flat. The knit stitches will remain largely undisturbed. No chunky seam in sight!
While this seam is not technically difficult, it may take a couple tries to get it looking perfectly neat and invisible.
The key is to get the seam tension to match the knitting’s tension. As mentioned above, a loose hand will usually serve you better than a tight one.
Once you get the tension right, the seam will look like a continuation of the knitting.