How to Read a Knitting Pattern for Beginners: Step-by-Step Guide
May contain affiliate links (what's this?)
If you’re new to knitting, picking up a pattern for the first time can feel like reading another language.
Don’t worry. Every experienced knitter has been there!
Once you understand the structure and abbreviations, knitting patterns become your best friend for creating scarves, hats, sweaters, and more.
This beginner guide will walk you through how to read a knitting pattern, what common knitting abbreviations mean, and the components of a pattern that you need to know!

What Is a Knitting Pattern?
A knitting pattern is a set of written instructions that tells you how to create a knitted project, step-by-step.
A pattern includes details like:
• Yarn type and yarn weight
• Needle sizes and needle type
• Other supplies
• Knitting gauge
• Finished measurements
• Pattern notes
• Pattern instructions
• Abbreviations
Think of it like recipe for knitting. Once you understand the format, you can follow almost any pattern!
Table of Contents

Read the Materials Section
Every pattern starts with a list of what you’ll need. These usually include:
Yarn
The pattern will tell you the yarn weight (like “worsted” or “super bulky”) and the amount of yarn (often given in yards or meters).
When a pattern includes multiple sizes, the amount of yarn will be organised within brackets for each individual size, from the smallest size to the largest size.
In the sock pattern above, the smallest size requires 50 yds, the second-smallest size requires 80 yds, the third-smallest size requires 110 yards and so on.
Knitting Needles
This includes both the size (like 6 mm / US 10), type (straight, circular, or double-pointed) and, for circular needles, the length (16”, 24” or longer).
Notions
Small accessories such as a tapestry needle, stitch markers, scissors, and measuring tape.
Tip: If you’re a beginner, consider using the same yarn weight and needle size listed in the pattern so your project turns out the right size.
Check the Knitting Gauge
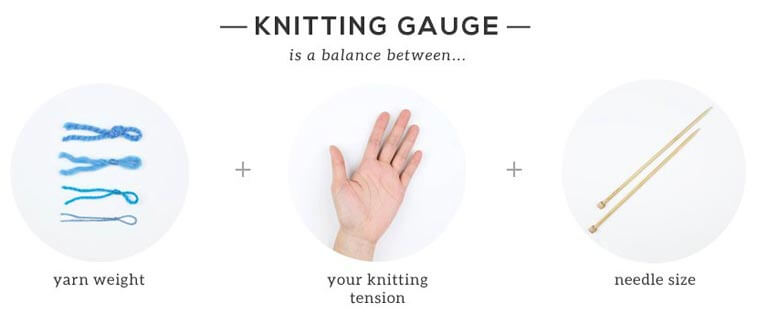
Knitting gauge tells you how many stitches and rows make up one inch or 4 inches in the pattern. It ensures your finished piece comes out the right size.
For example, you might see:
Gauge: 16 sts and 22 rows = 4” in Stockinette Stitch
To check your gauge, knit a small square swatch in stockinette stitch and measure it.
If your stitches are too tight or loose, adjust your needle size before starting.
Knitting gauge is a big topic, so if gauge is new to you, check out my post on how to check knitting gauge for beginners.
Finished Measurements and Schematics
A knitting pattern will often include the finished measurements of the project.
For simple projects, the width, circumference and height will be listed.
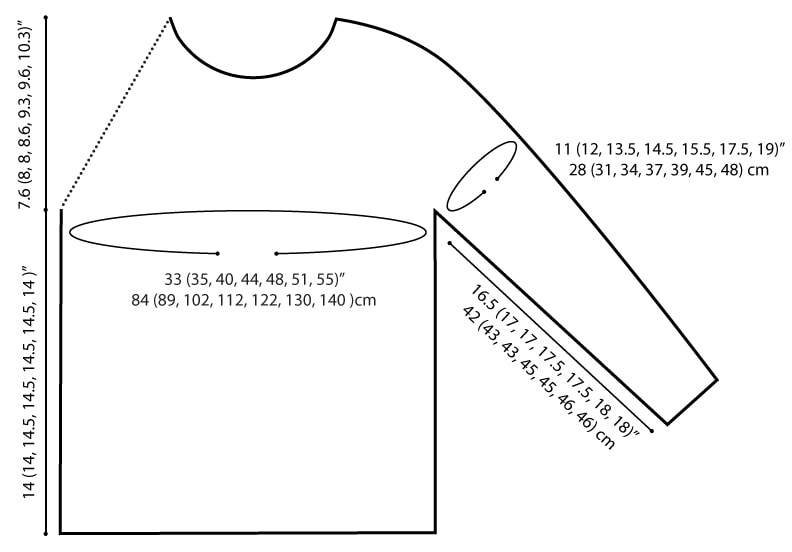
If a project is complex, a schematic could be used to convey the finished measurements.
A schematic is a graphic representation with measurements of the finished project. Here’s the schematic for my Everyday Raglan pattern.
Understanding Pattern Abbreviations
Knitting patterns use abbreviations to save space. Here are some of the most common ones:
| Abbreviation | Meaning | Example |
|---|---|---|
| k | knit | K10 = knit 10 stitches |
| p | purl | p5 = purl 5 stitches |
| yo | yarn over | this creates a hole or increase |
| k2tog | knit two stitches together | decreases one stitch left-leaning |
| ssk | slip, slip, knit | decrease one stitch right-leaning |
| st(s) | stitch(es) | stiches on your needle |
| RS | right side | the front side (or right side) of the knitting |
| WS | wrong side | the back side (or wrong side) of the knitting |
| rep | repeat | repeat the steps within brackets or asterisks |
| CO | cast on | casting on stitches to begin the project |
| * | asterisk | asterisks are used to mark a section to be repeated |
| BO | bind off | binding off at the end of a project |
Most patterns include a glossary at the beginning or end explaining the abbreviations used in their pattern.
Read Through the Pattern
While you don’t need to read through the pattern line by line (it’s not a novel after all!), it’s a good idea to skim the pattern so you get a general sense of the pattern construction and techniques.
For knitters who are really type-A (like me!), reading the pattern can clue you in to unfamiliar techniques you may want to practice before getting started on the project.
Understanding Size Instructions in a Pattern
Knitting patterns with multiple sizes will often include size instructions within brackets.
Let’s say a sweater pattern has 7 sizes that come in XS, S, M, L, 1X, 2X, 3X.
The first line of the pattern says:
CO 45 (48, 51, 55, 59, 63, 68) sts
The pattern is asking you to cast on a number of stitches.
The first number (45) refers to the smallest size, an XS.
The second number (48) refers to the second smallest size, a Small.
The third number (51) refers to a Medium. And so on.

Whenever you see a number followed by more numbers within brackets, these are most likely size-related instructions.
A good practice when knitting a pattern with multiple sizes is to go through the pattern and highlight or circle the instructions that relate to your size.
Understanding Repeats, Brackets and Asterisks
Patterns often use the abbreviation “rep” or the symbols * and () to show repeating sections.
For example:
*K2, P2; rep from * to end of row.
This means you knit 2, purl 2, and repeat the sequence between the asterisks across the whole row.
Another example:
(K1, yo, k2tog) 6 times
This means to work the steps inside the parentheses six times in total total.
Learning how to read a knitting pattern may seem tricky at first, but with a little practice, you’ll soon be reading them fluently, just like any other language!
Start with small, simple projects and keep a list of abbreviations handy.
Before you know it, you’ll be confidently knitting hats, scarves, and even sweaters from patterns you once found intimidating.